Bear Claw Pastries
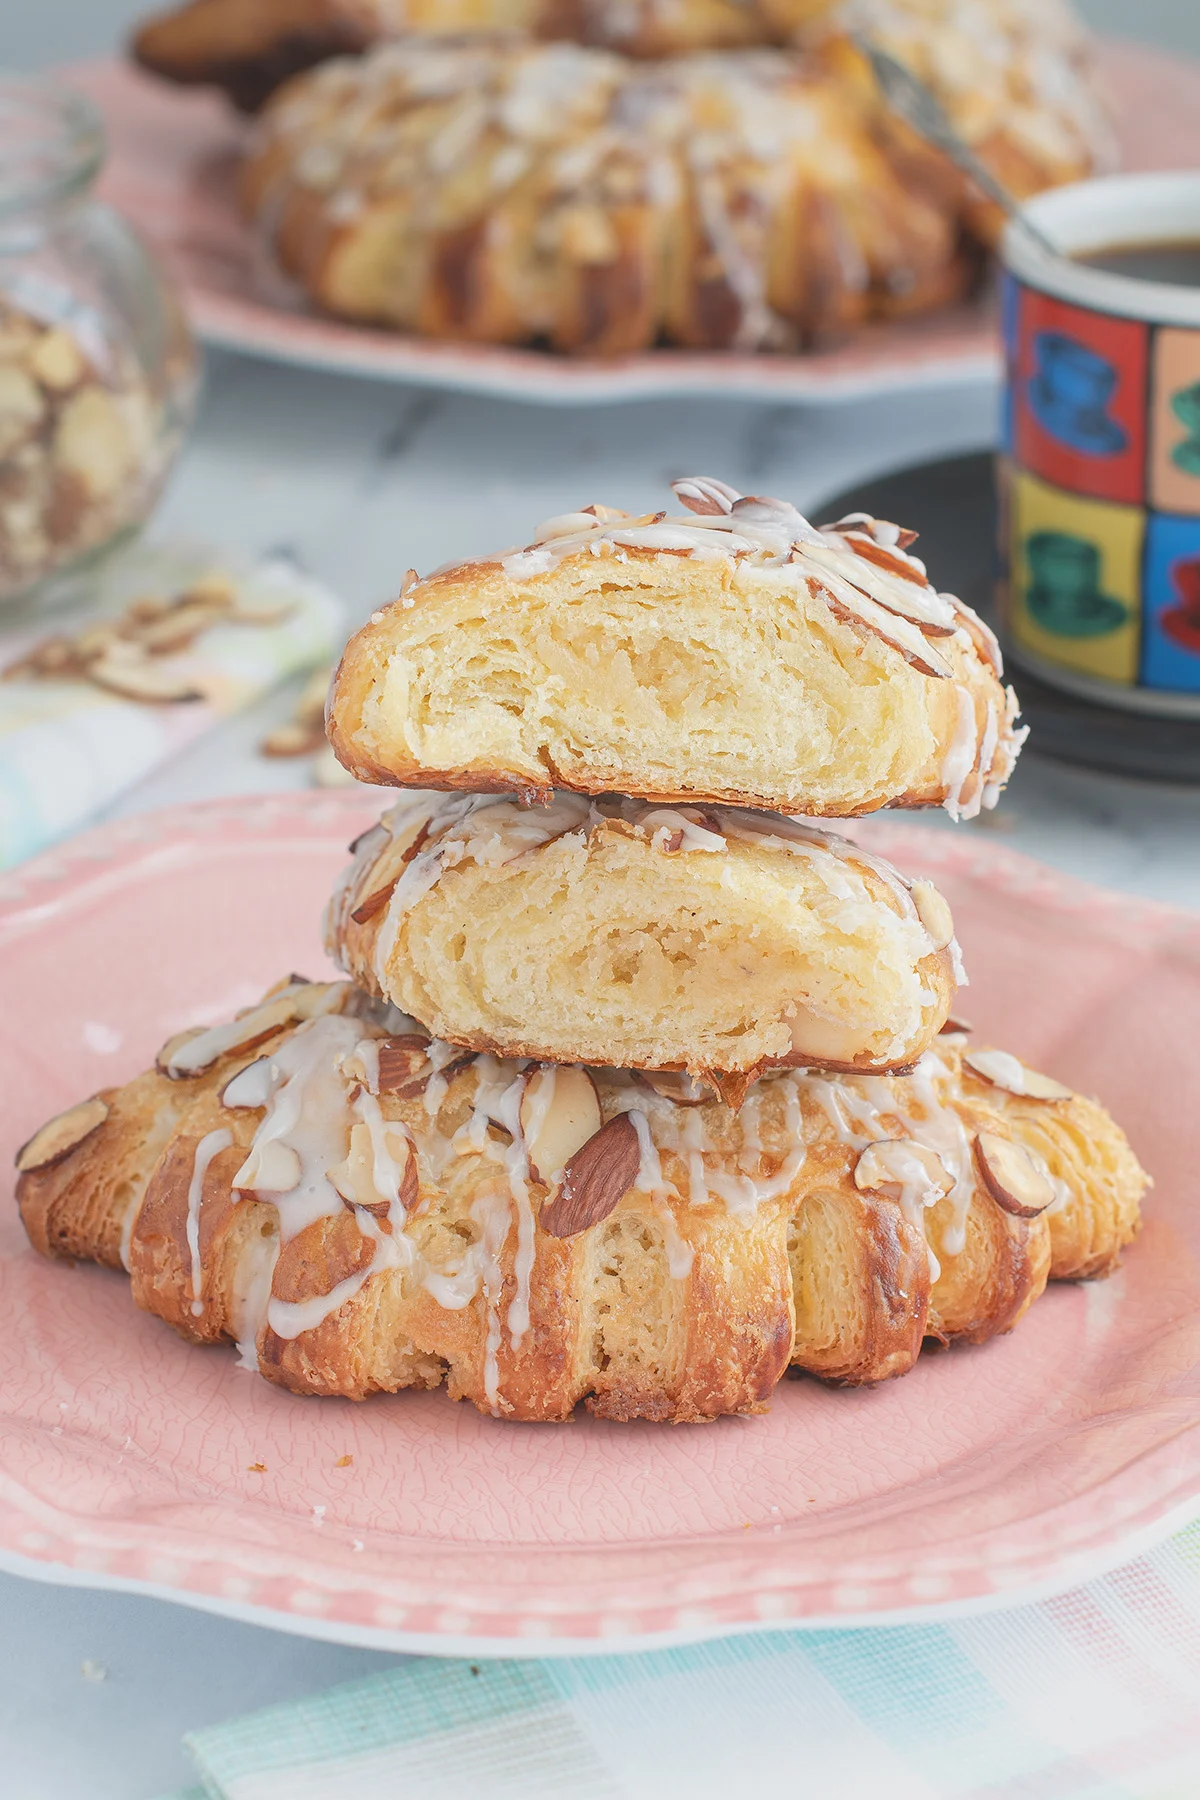
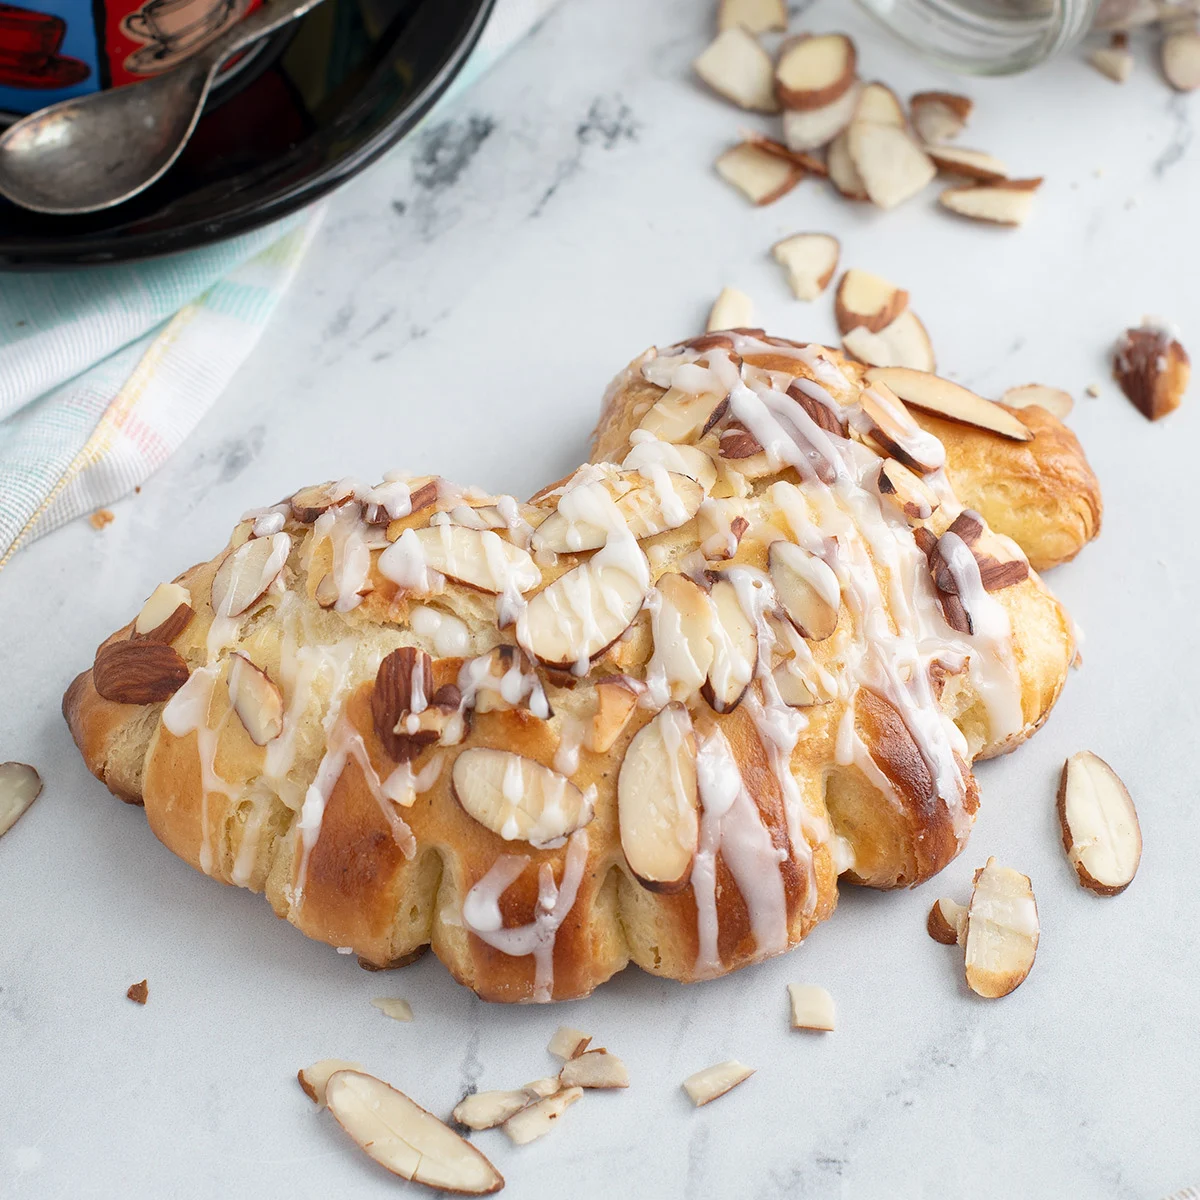
These scrumptious Bear Claw Pastries are made with real Danish pastry dough and a luscious almond filling. You can let the pastries rise in the refrigerator overnight and bake first thing in the morning.
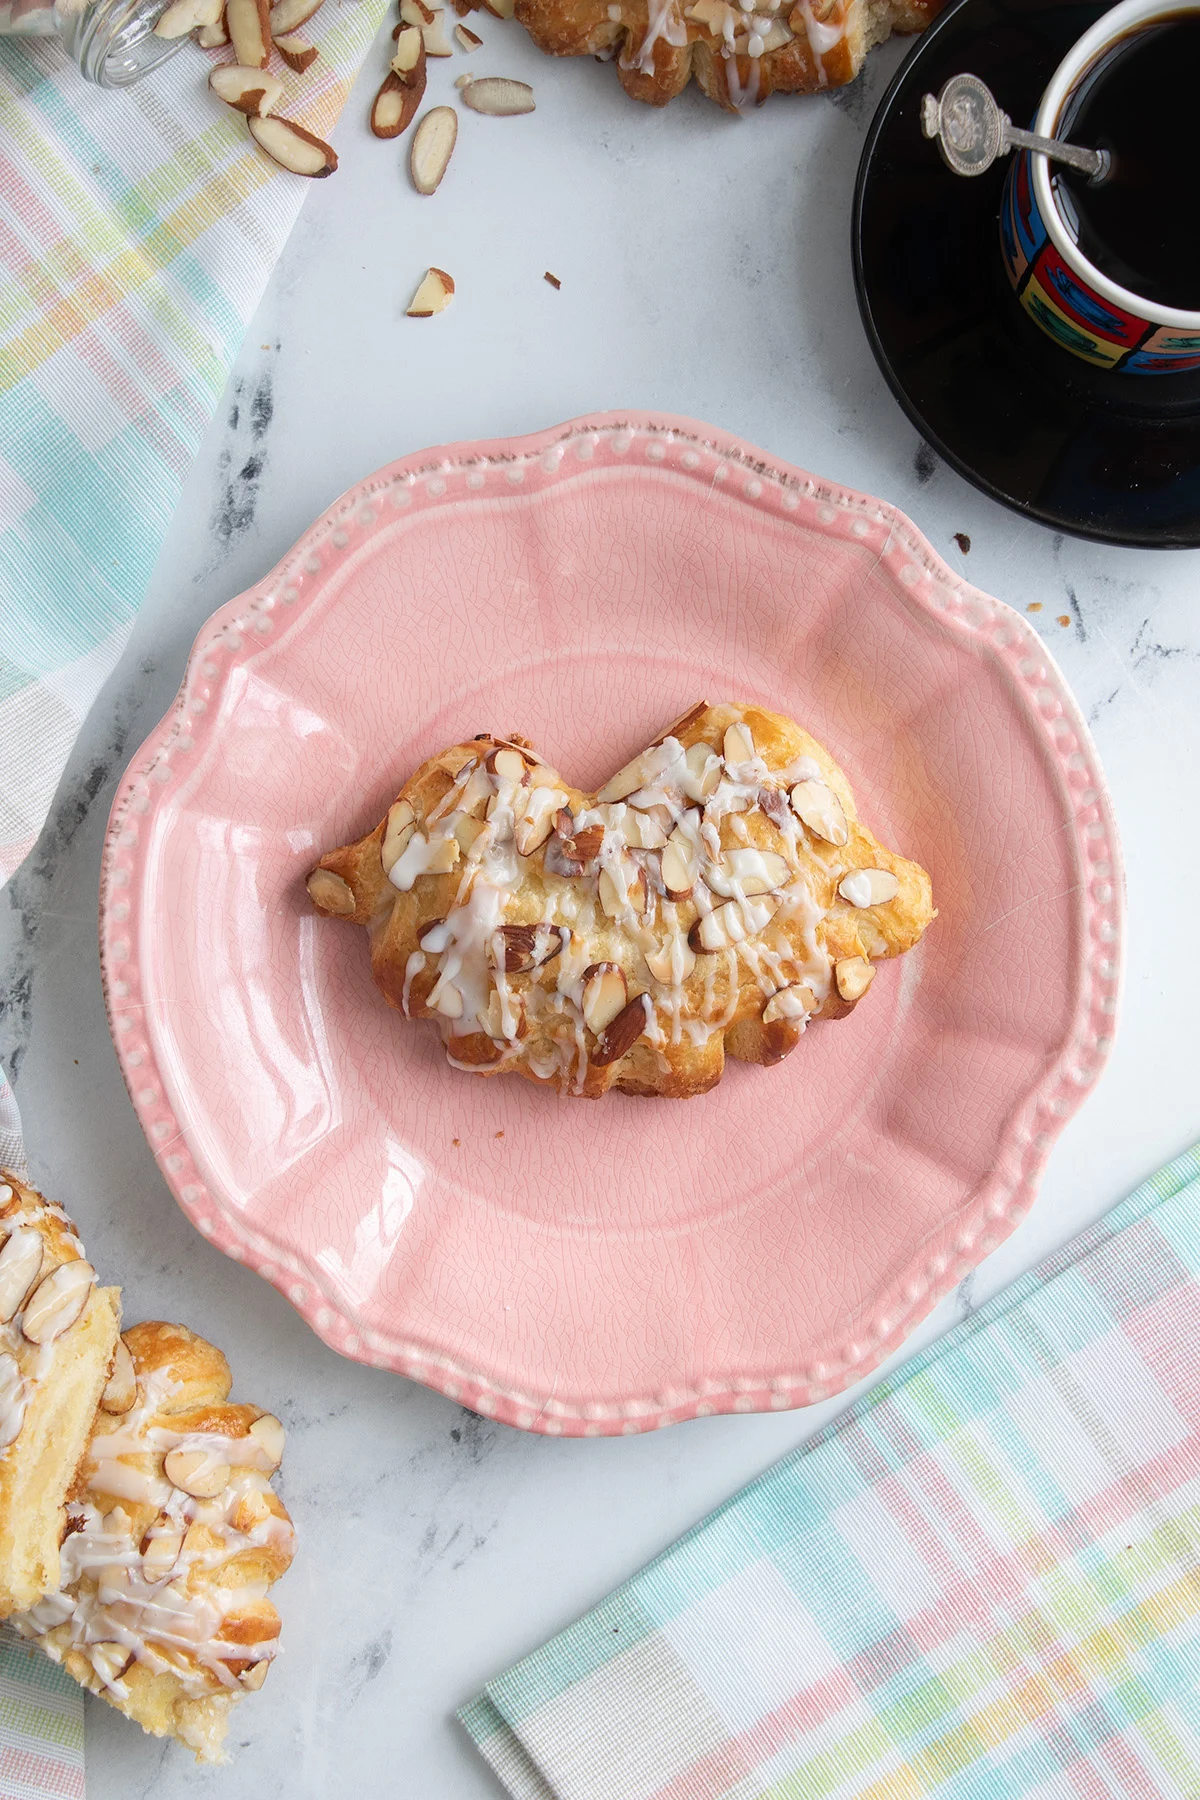
Table of contents
Why this is the best Bear Claw recipe
Bear Claws are a type of Danish pastry. Like puff pastry and croissants, Danish dough is laminated (layered with butter).
The good news is, the process can be streamlined quite easily without compromising the classic texture. The results are wonderful and the process is quite easy to follow.
Not only have I streamlined the process for making the dough, I’ve perfected a way of assembling the Bear Claws that is easy to follow and minimizes the amount of filling leakage.
These Bear Claw Pastries are fabulously delicious and totally doable for the home baker. Enjoy!
Ingredients
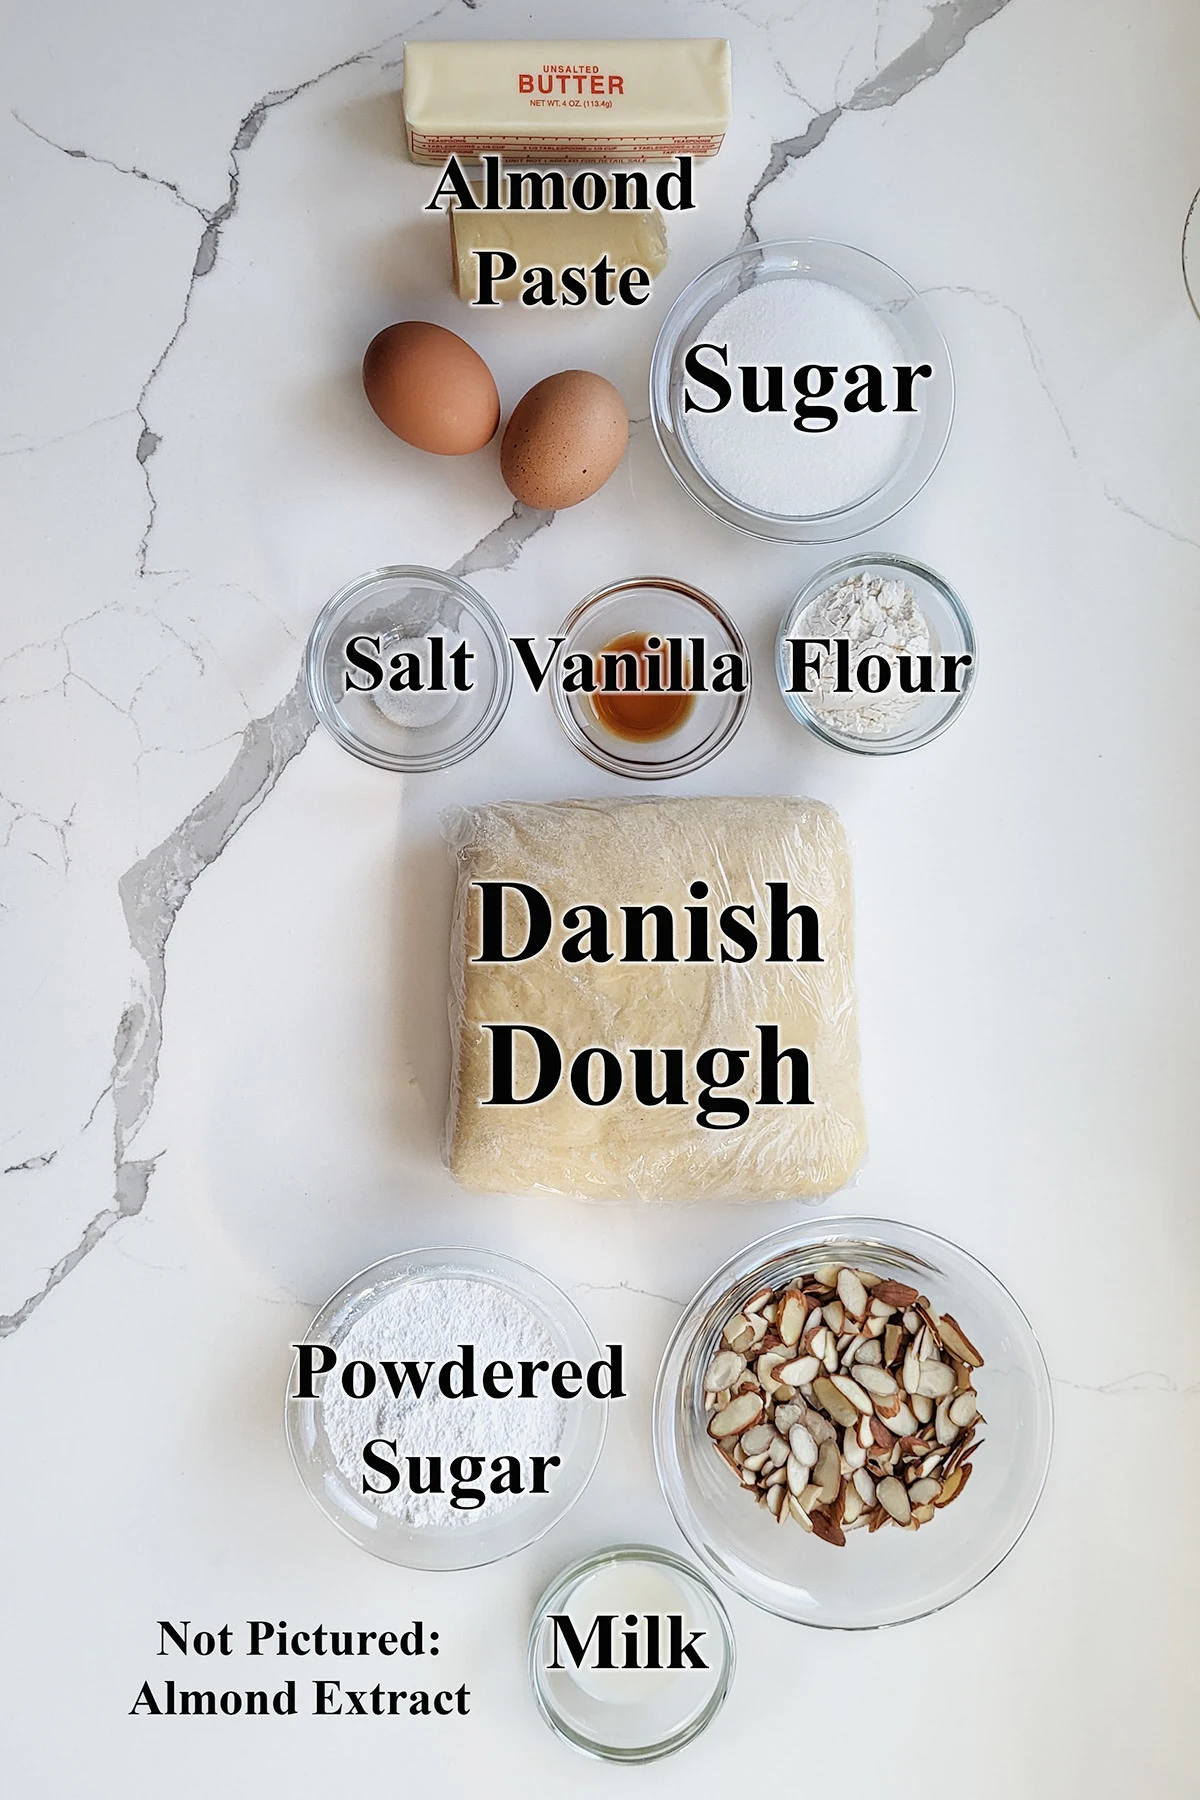
Ingredient Notes
- Danish Dough – I highly recommend using Danish Dough (or Sourdough Danish Dough) to make the most authentic and delicious bear claws. But you can make them using frozen puff pastry sheets. Puff pastry is not a yeasted dough so the results will be different but still tasty.
- Almond Paste – Make sure to use pure almond paste, not marzipan. Marzipan has more sugar and less of the quintessential “bitter almond” flavor.
How to make Bear Claw Pastries
Here’s what the recipe process looks like at each stage. Refer to the recipe card below for measurements and exact instructions.
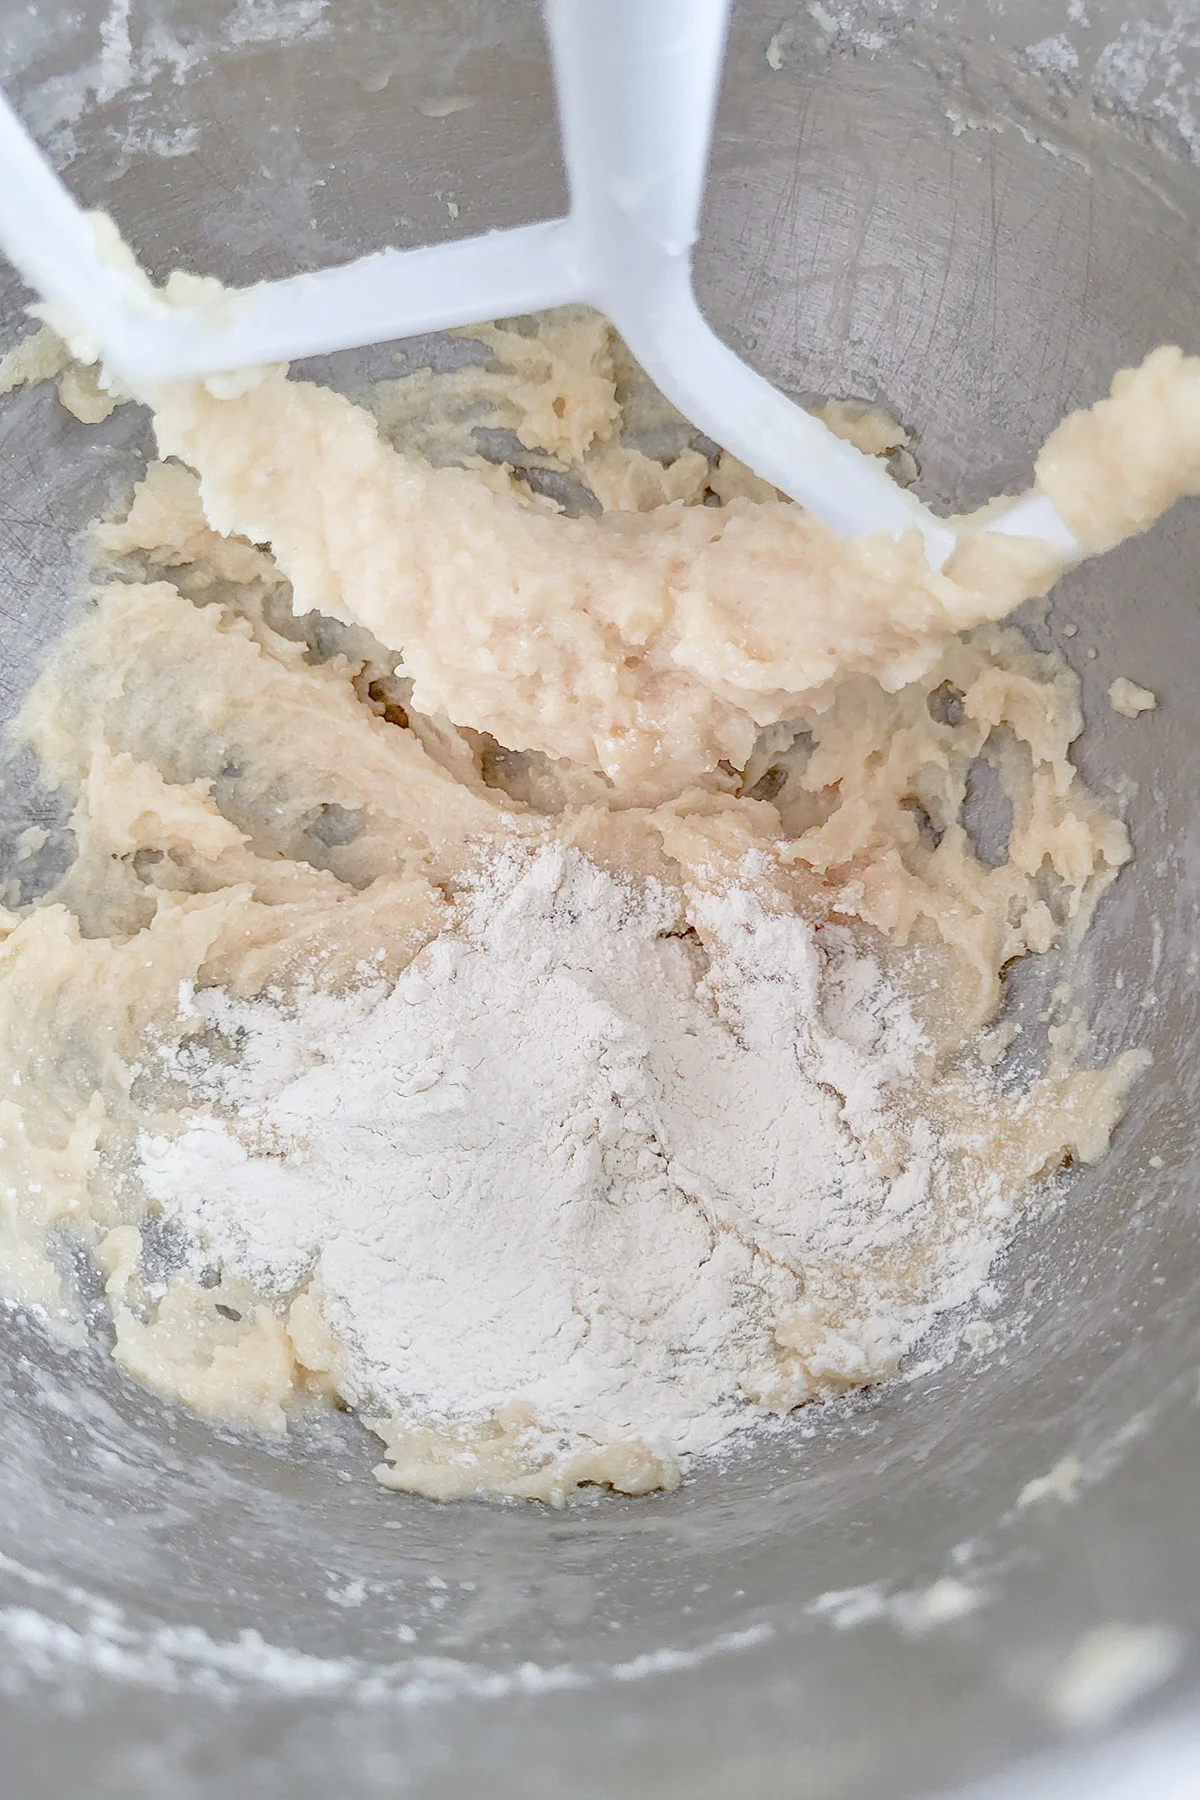
- Mix the filling and refrigerate until you’re ready to assemble the pastries.
- The filling can be refrigerated for up to 3 days or frozen for a month.
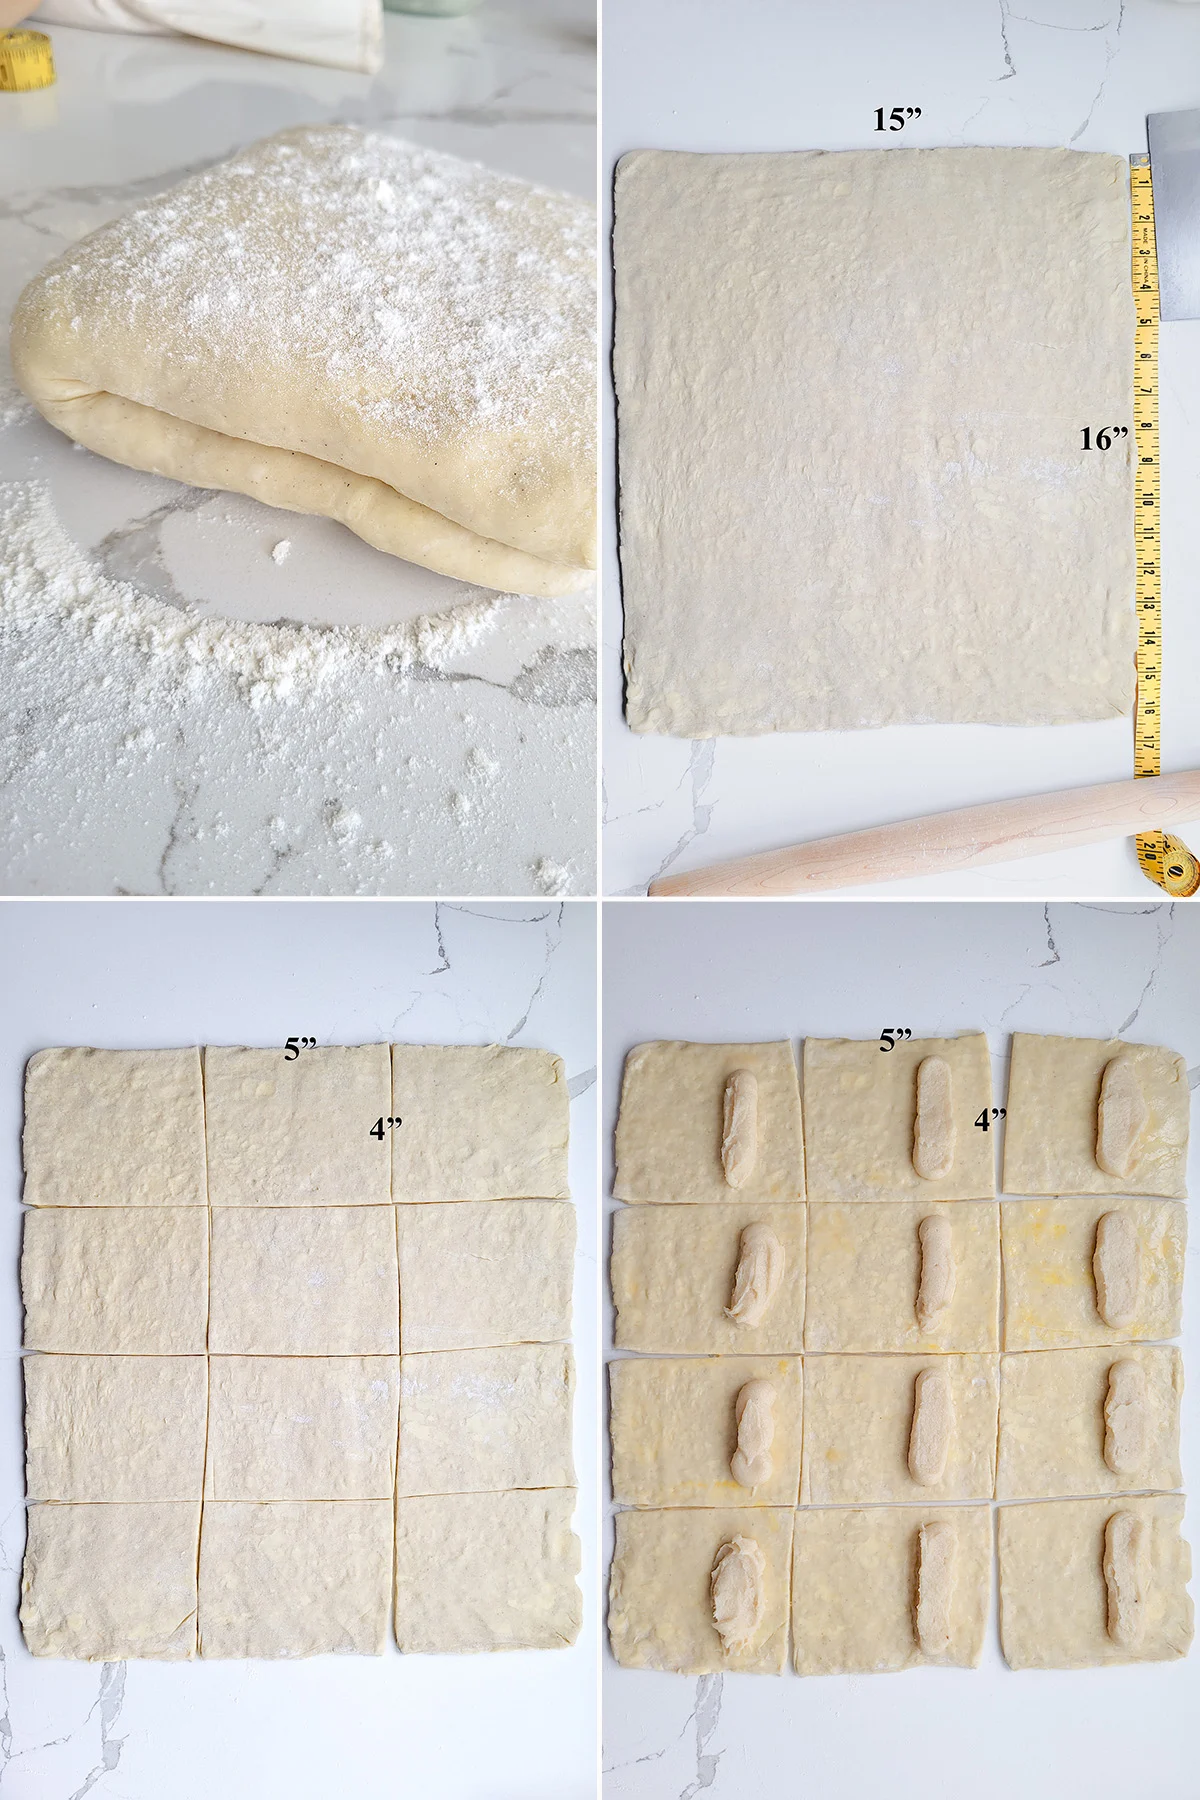
- Roll the Danish dough on a lightly floured surface.
- Roll the dough to a 15″x16″ rectangle.
- Cut the dough in to twelve 5″x4″ rectangles.
- Brush the rectangles with egg wash. Pipe a line of filling along the shorter side of the rectangle, leaving a 1/2″ border on either side.
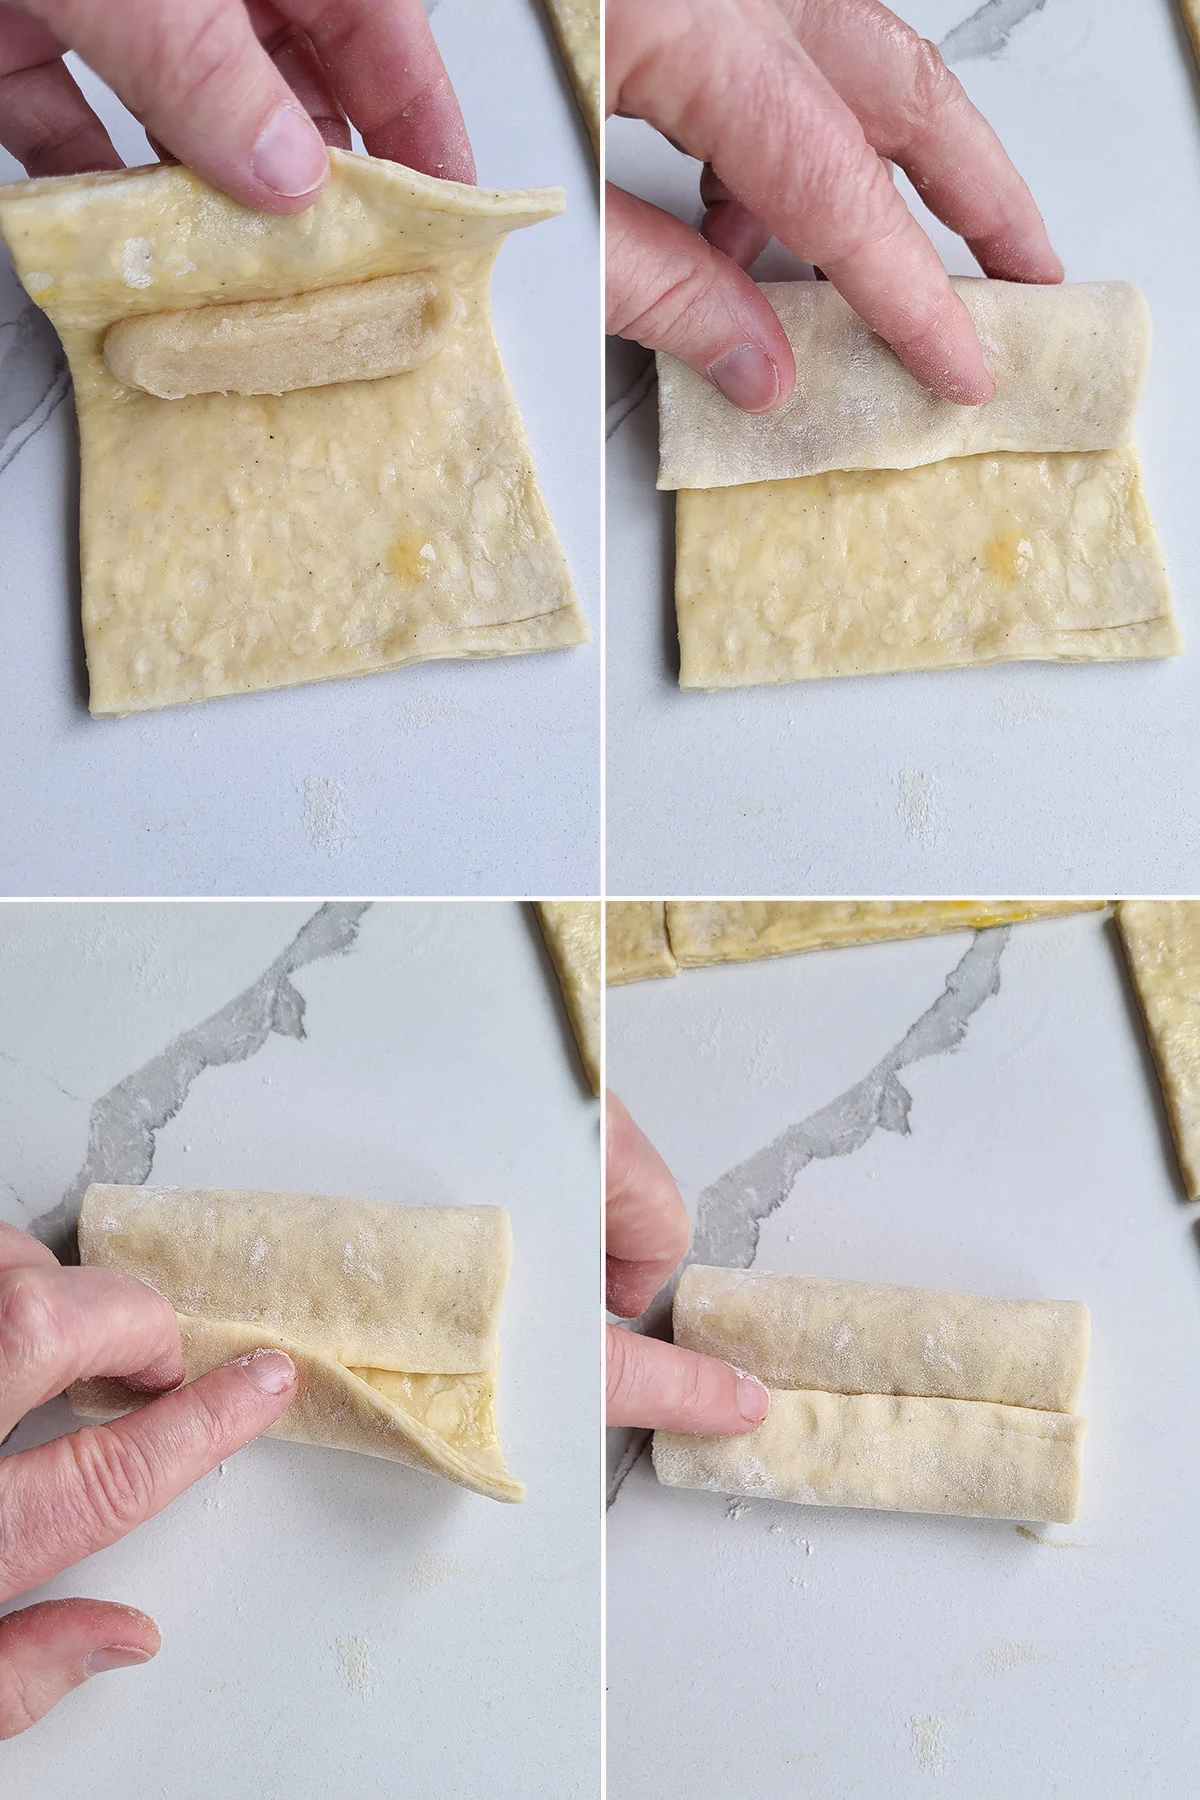
- Fold the top side of the dough over the filling.
- Place it along the bottom side of the filling.
- Fold the bottom side of the dough towards the middle to cover the seam.
- Press along the seam to encase the filling.
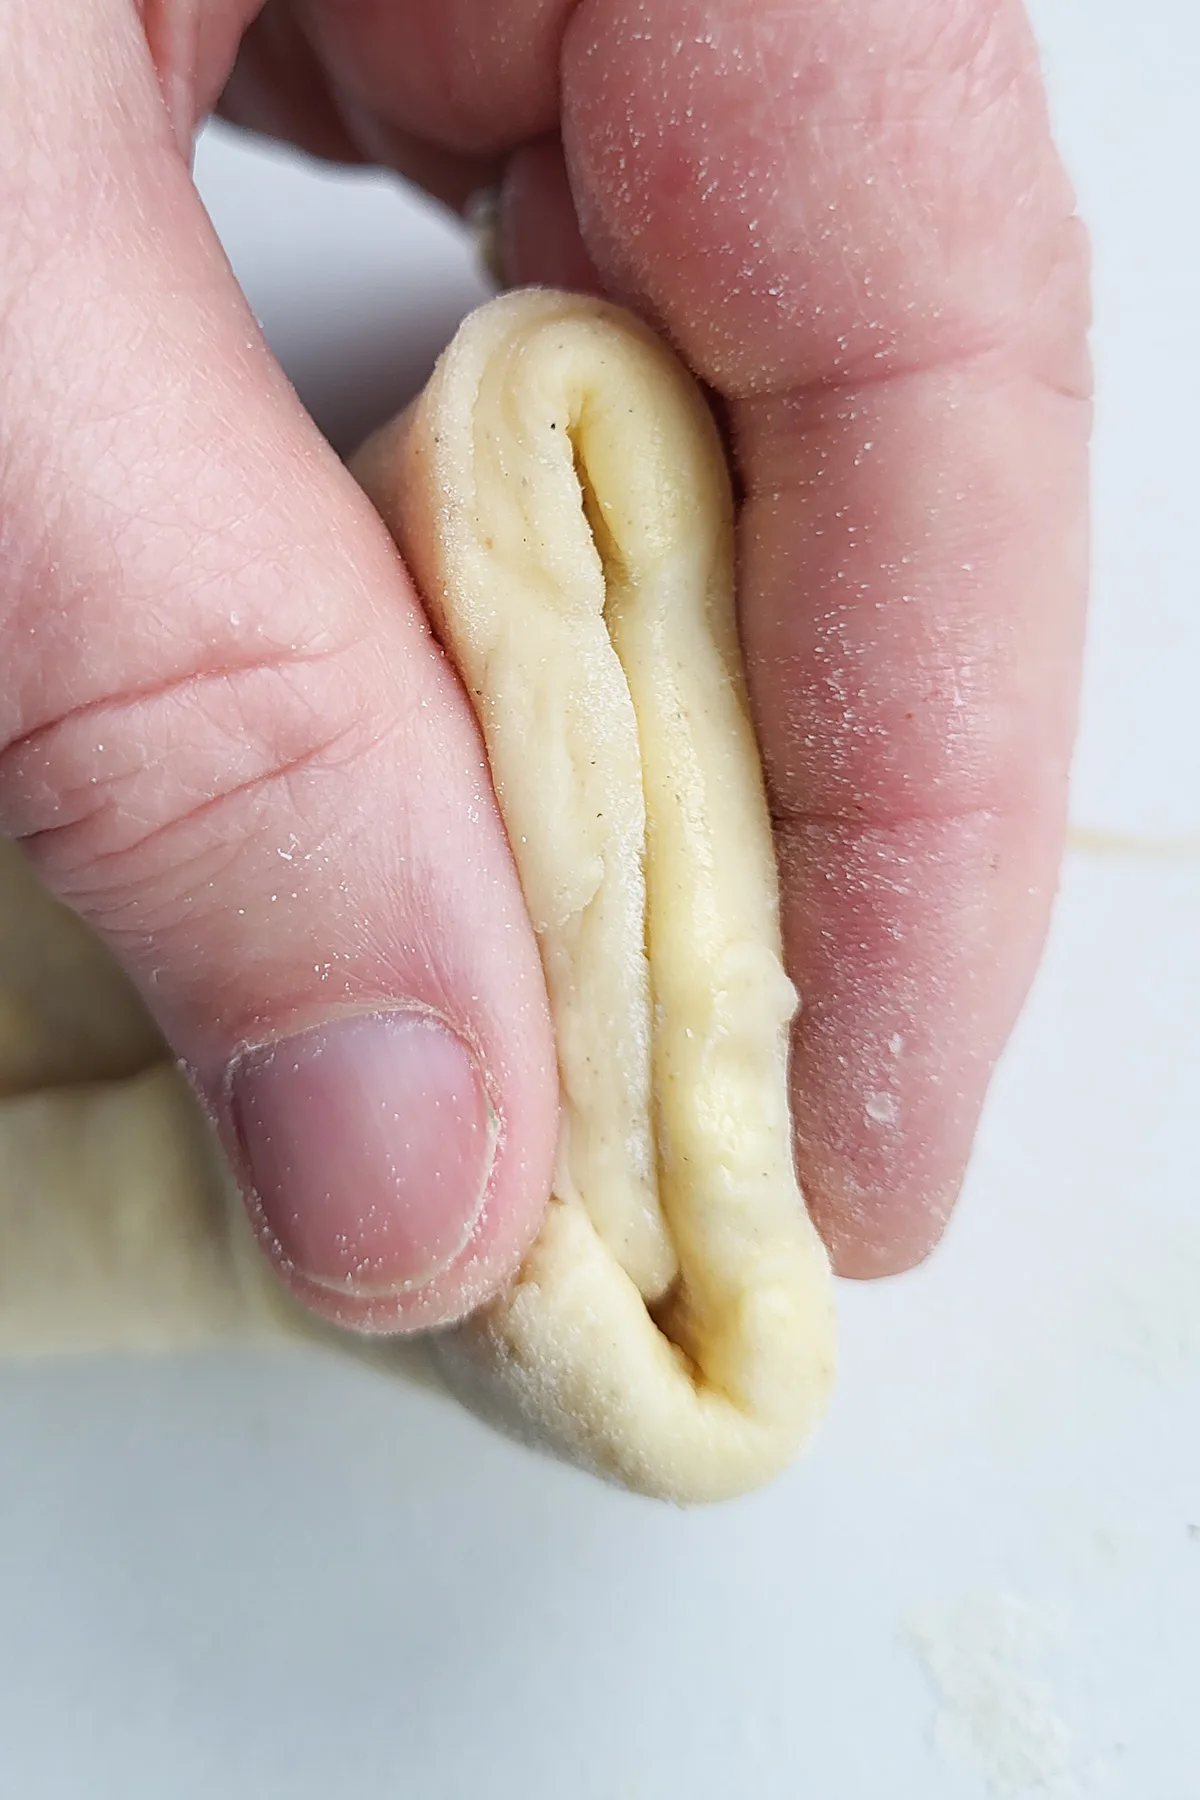
- Pinch the ends to enclose the filling.
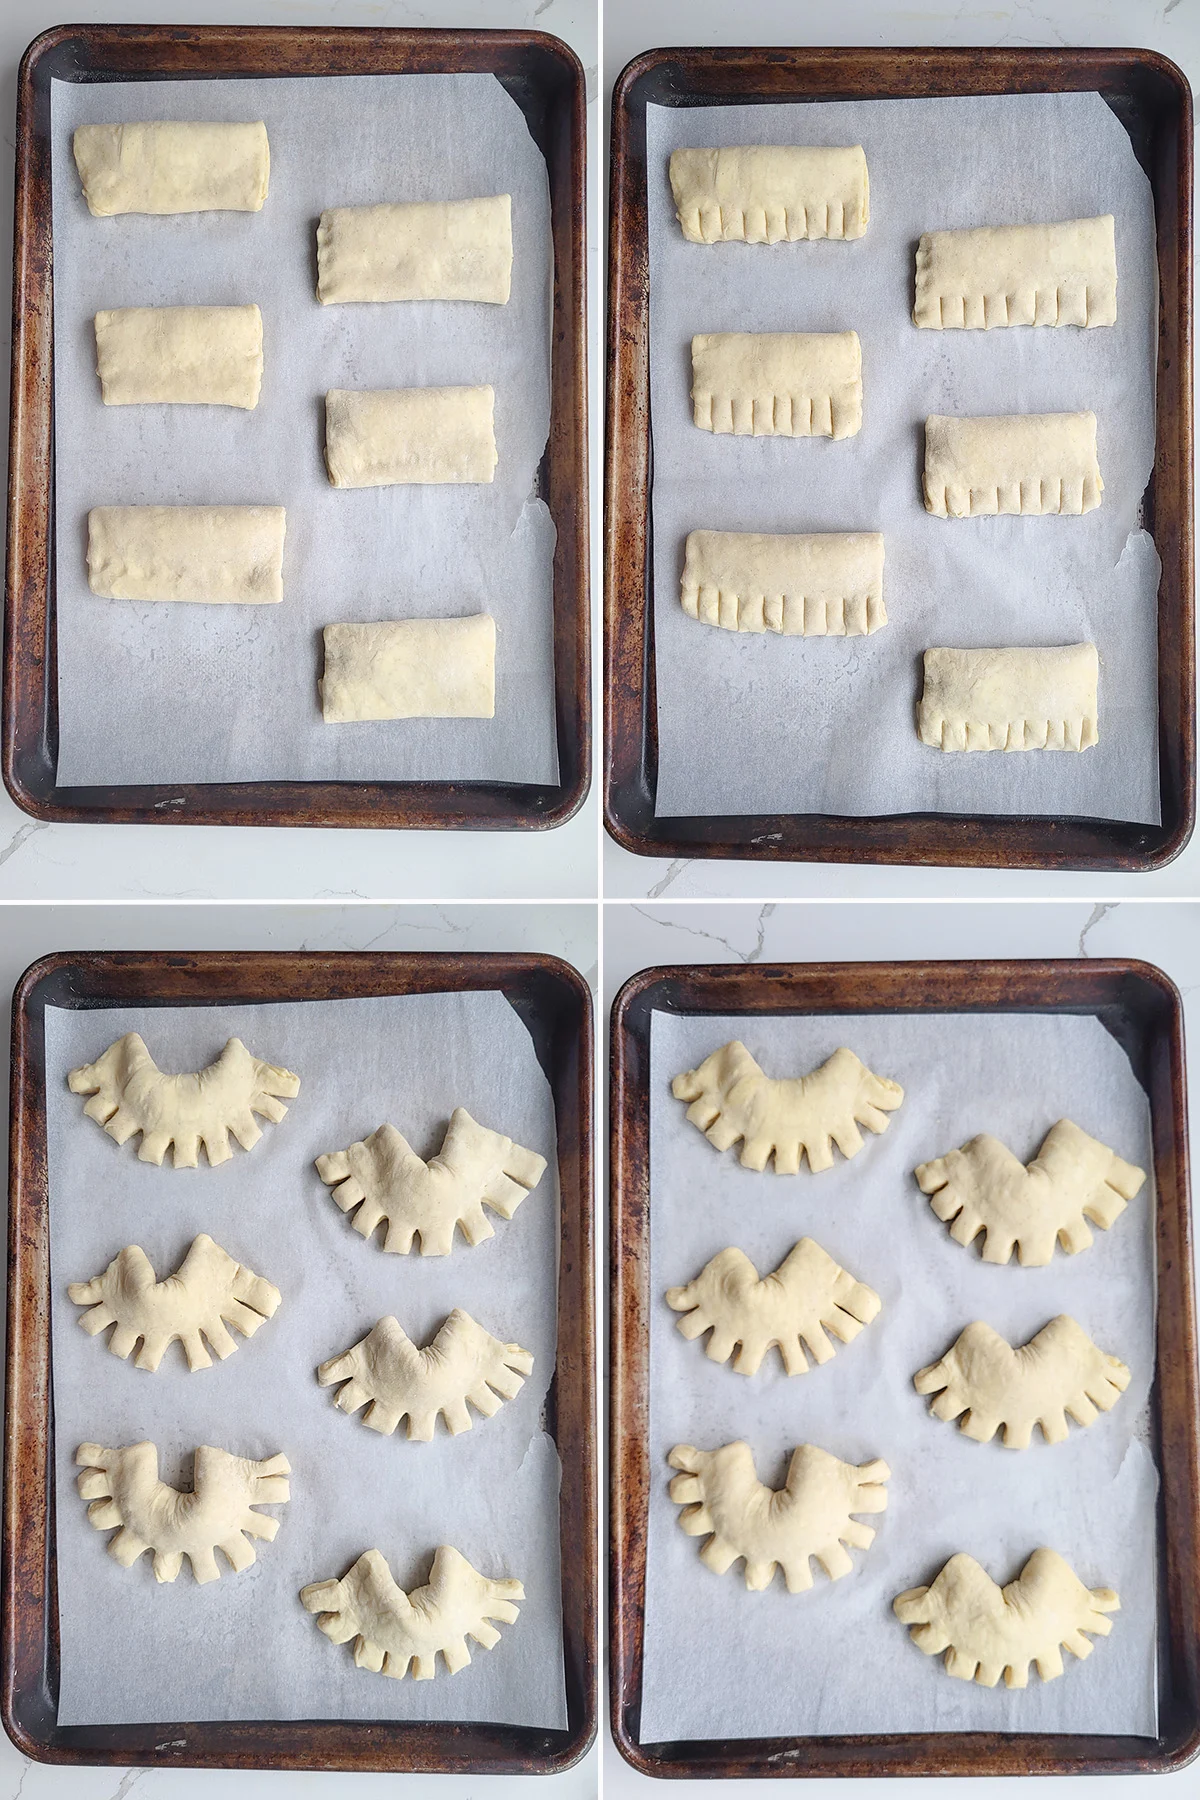
- Line the pastries on the prepared baking sheets, seam side down.
- Cut 1/2″ slits in the unfilled dough to make the “claws”.
- Bend the pastries back to form an arc and open up the claws.
- Cover the tray and set it aside to proof at room temperature or refrigerate overnight.
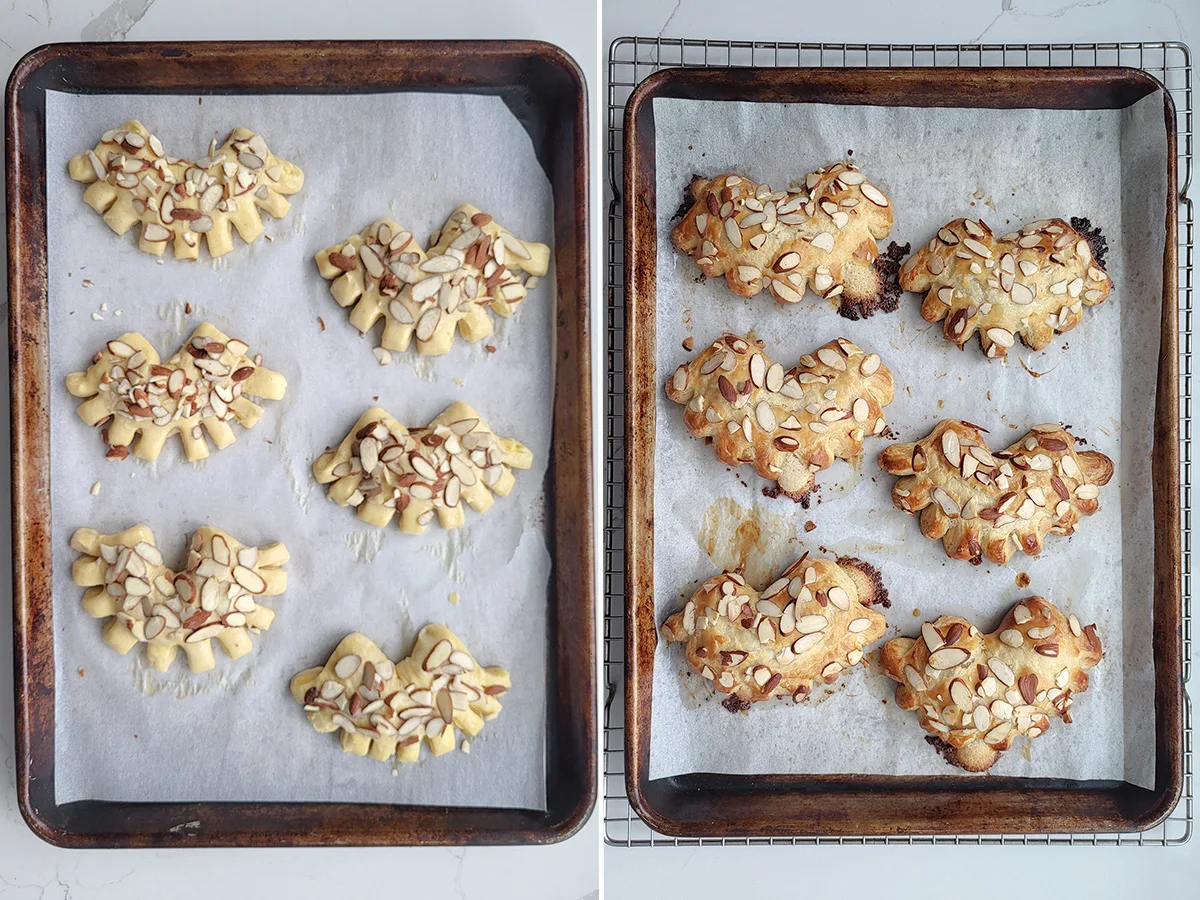
- Brush the pastries with egg wash and sprinkle with sliced almonds.
- Bake until golden brown and well-puffed.
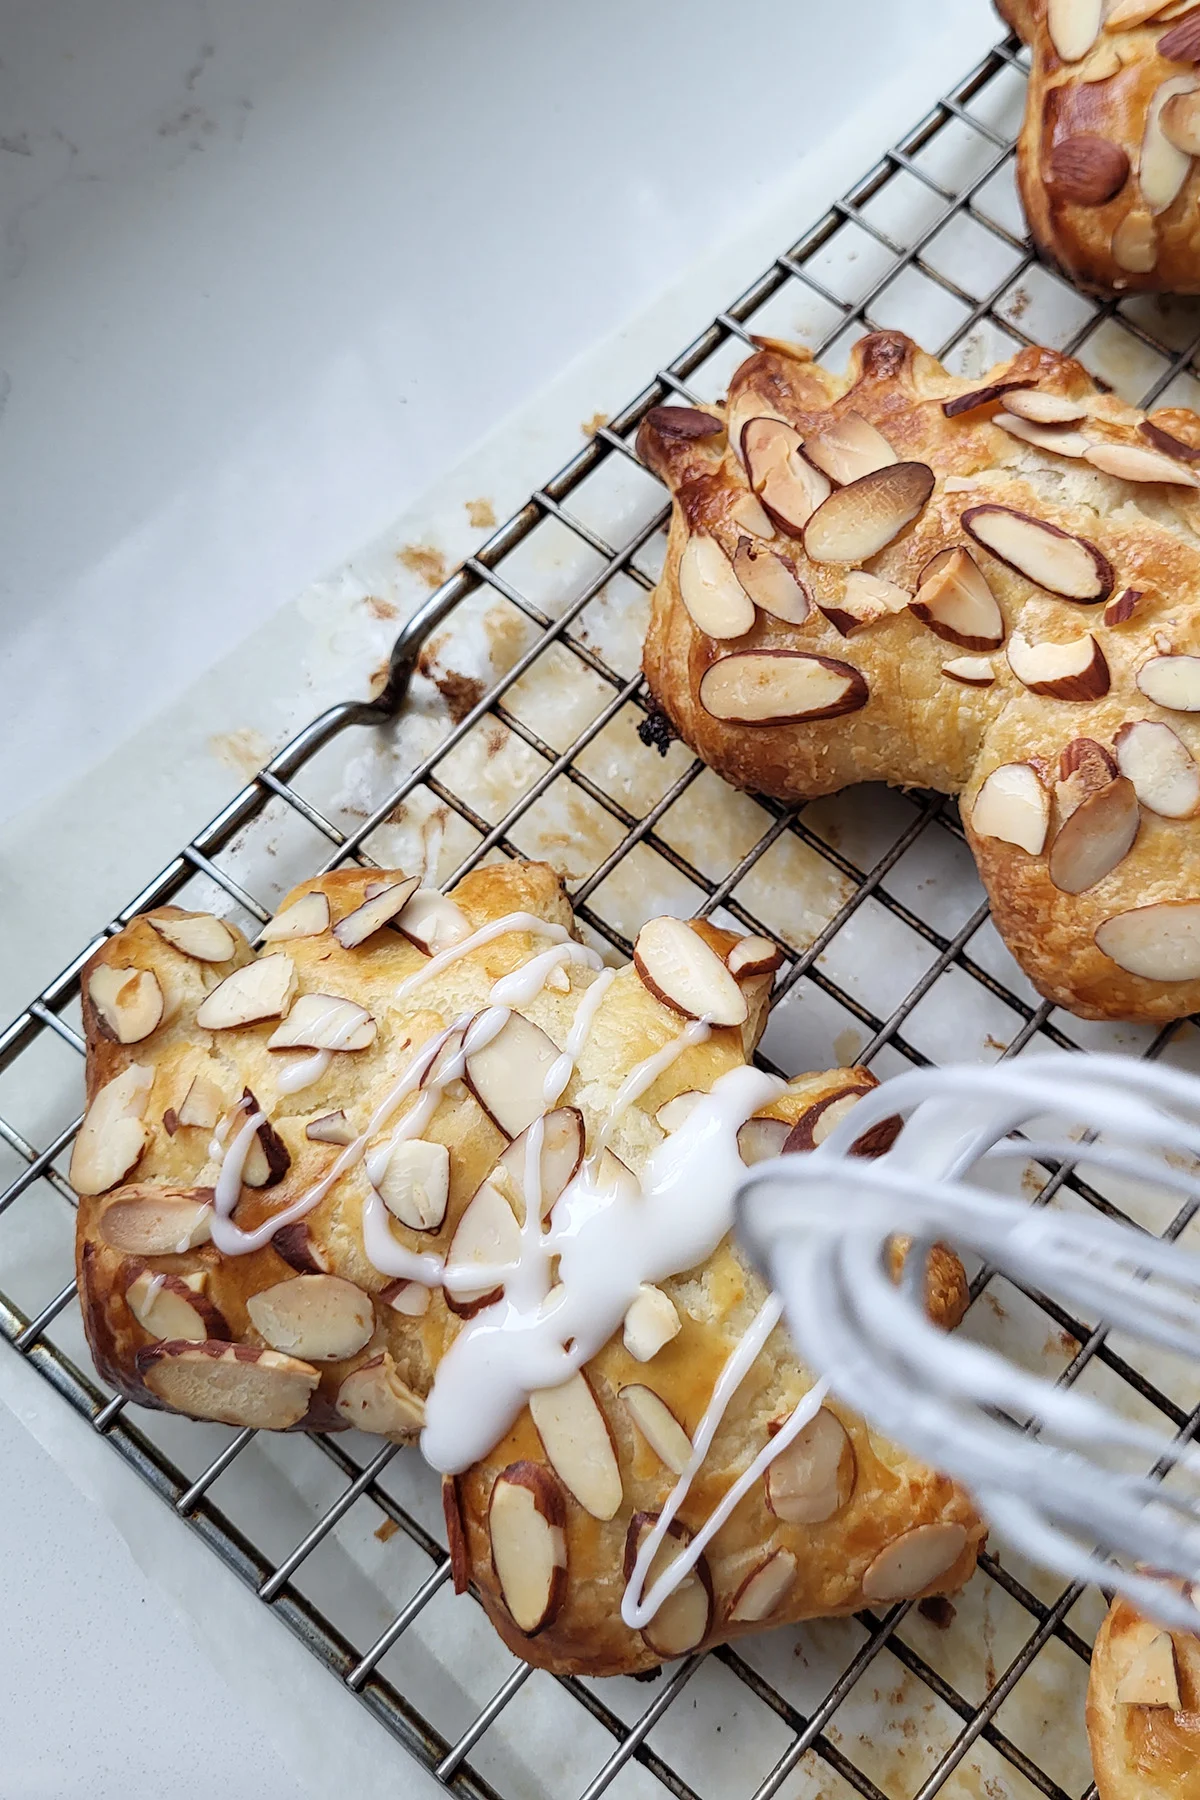
- Drizzle the icing over the slightly warm pastries.
Work Ahead
- The Danish dough can be made ahead and refrigerated for up to 2 days or frozen for a month.
- The filling can be made ahead and refrigerated for 2-3 days or frozen for a month.
- The un-baked bear claws can be held in the refrigerator for 8 hours or frozen for up to a month.
- Defrost unbaked pastries, bring them to room temperature and let them rise before baking.
Storage
Bear Claws are best the day they are baked. Leftovers can be frozen for up to a month. Warm them in a 200F oven to refresh the pastry.
More Danish Recipes
More Pastries
If you love this recipe as much as I do, I’d really appreciate a star rating and a quick comment. Ratings and comments help my recipes show in search results. Thanks!
Bear Claw Pastry
Ingredients
Almond Filling
- 3 oz almond paste
- 2 oz granulated sugar (¼ cup)
- 1 oz unsalted butter (room temperature)
- 1 teaspoon vanilla extract
- ⅛ teaspoon table salt
- 1 large egg white
- 2 tablespoons all purpose flour
Assembly
- 1 recipe Danish Dough (see note)
- OR
- 1 recipe Sourdough Danish
- 1 egg (for egg wash)
- 3 oz sliced almonds (1 cup)
- 2-3 teaspoons milk
- 1-2 drops almond extract (optional)
- 2 oz confectioner sugar (1/2 cup)
Instructions
Make the filling
- Using a beater attachment on your mixer, mix 3 oz almond paste with 2 oz granulated sugar until the almond paste is broken up in the sugar. Add 1 oz unsalted butter and mix until well-combined. Add 1 large egg white, 1 teaspoon vanilla extract, ⅛ teaspoon table salt and 2 tablespoons all purpose flour. Mix to combine. Refrigerate the filling until ready to assemble. The filling can be made up to 2 days in advance and refrigerated, or frozen for up to a month.
Assembly
- Line two half sheet pans with parchment paper. Fill a piping bag fitted with a 1/2" plain tip (or you can snip the tip off a disposable piping bag) with the almond filling. Whisk 1 egg with a tablespoon of water for egg wash.
- Turn the dough out onto a lightly floured surface. Roll the dough to a 15"x16” rectangle.
- Use a pizza cutter or sharp knife to cut the dough into 3rds along the 15" side and 4ths along the 16" side. You should have twelve 5"x4" rectangles. Lightly brush all the squares with egg wash. Starting 1/2" from the edge of a rectangle pipe a 1/2" thick line of filling along the short side of the rectangle about 1/3 from the top. Stop a 1/2" from the other edge. Repeat with all the rectangles. (see photos)
- Wrap the top side of the dough over the filling and set it just over the other side of the filling. Fold the bottom side of the dough up to meet the seam. Press the the seam and both ends to seal in the filling. You'll end up with a tube of filling wrapped in dough with a flap of unfilled pastry (see photos).
- Place a pastry on the prepared baking sheet with the seam side down. Use the tip of a paring knife to cut 1/2" slits in the unfilled flap of dough (these are the "claws"). Bend the two ends of pastry back to form an arc and to open up the "claws" of the pastry. Repeat with all the pieces of dough. You should fit 6 pastries per sheet pan.
- Cover the pans with plastic wrap and set aside to rise for 1 1/2 – 2 hours, or refrigerate overnight. (see note) The dough should look lighter and a little puffy but may not double in size. If you refrigerate the pastries allow them to come to room temperature before baking. While the dough is rising, preheat the oven to 375 °F.
- Brush each pastry with egg wash and sprinkle with sliced almonds. Bake in the middle rack of the oven until the pastry is well-puffed and golden brown, about 15 minutes. Rotate the trays halfway through baking to promote even browning.
- While the bear claws are baking, whisk 2-3 teaspoons milk and 1-2 drops almond extract into 2 oz confectioner sugar. The glaze should have the texture of pancake batter. Add more sugar if it’s too loose or more milk if it’s too thick.
- Remove the bear claws from the oven and let them cool on the pans for 10 minutes. (See note) Use a fork or whisk to drizzle the glaze over the warm pastries.
- Serve slightly warm or at room temperature.
Would you like to save this recipe?
Equipment
As an Amazon Associate and member of other affiliate programs, I earn from qualifying purchases.




Question: instructions state to add cream to the filling but cream is not in the recipe list.
In that step “cream” does not refer to an ingredient but the technique of “creaming” the butter and sugar together. That is, beating the butter and sugar until it is light and fluffy. But I can see how it could be confusing if you aren’t familiar with that technique. I’ll reword it to be more clear.
Yes I realized that after I asked. Cream referred to the method and not the dairy product.