Whole Wheat Sourdough Sandwich Bread
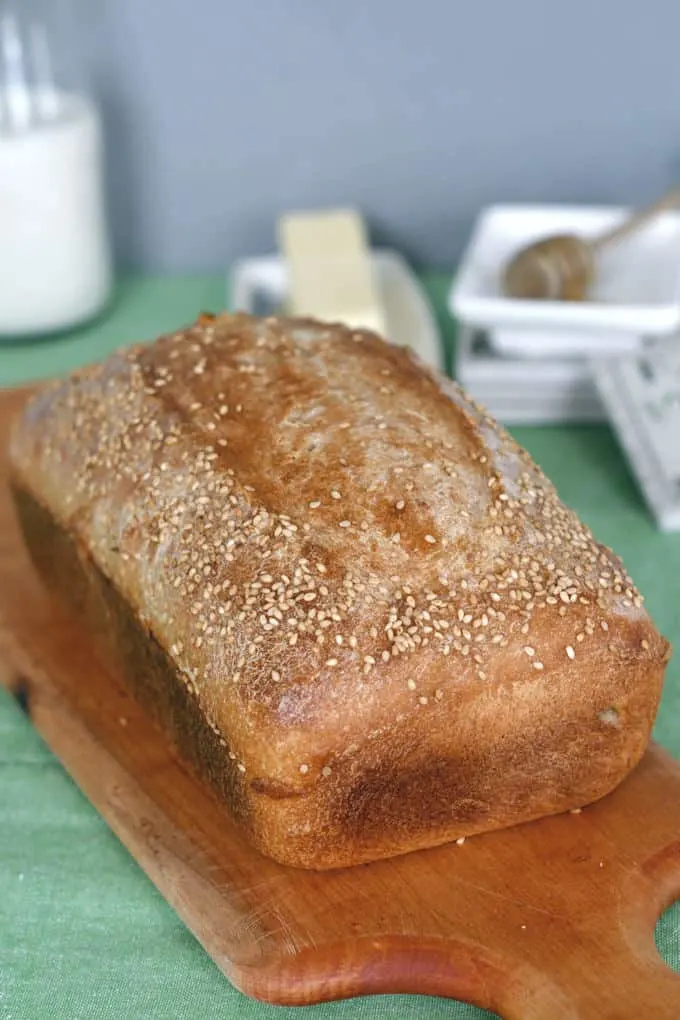
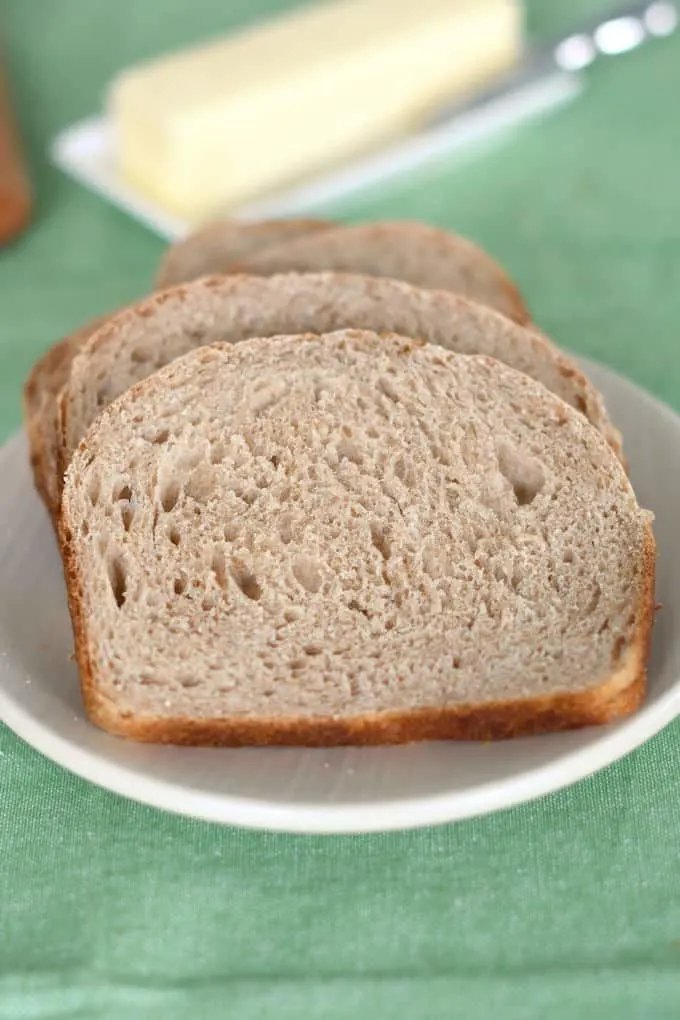
Whole Wheat Sourdough Sandwich Bread tastes fantastic and will keep fresh for several days. Milk and honey give this loaf a soft crumb and crust. Sourdough starter enhances the hearty whole-grain flavor.
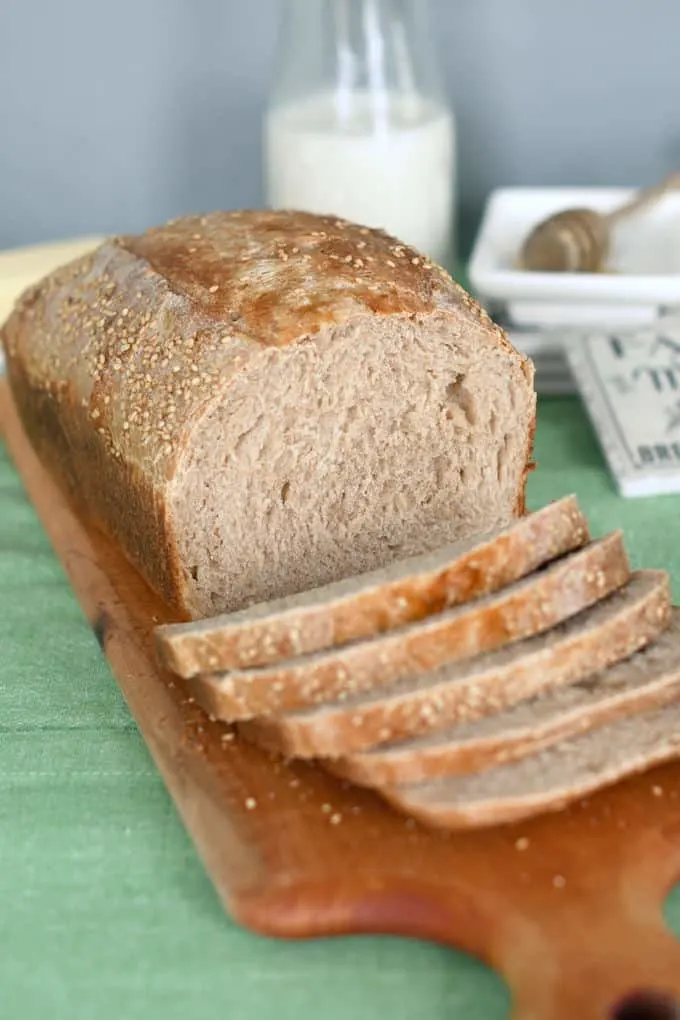
Table of contents
Why you’ll love this recipe
This recipe is a variation of my popular Milk & Honey Whole Wheat Bread recipe. This is a perfectly soft and slightly sweet sandwich bread.
Although this sourdough wheat bread recipe takes a good 12+ hours from start to finish, the vast majority of the time is hands off.
To make this recipe even more convenient, you can let the dough rise over night. A long rise in the refrigerator does only good things for the bread.
If you don’t have one, check out my post to learn How to Make a Sourdough Starter. Then check out my system to Feed and Maintain Sourdough Starter.
Ingredients
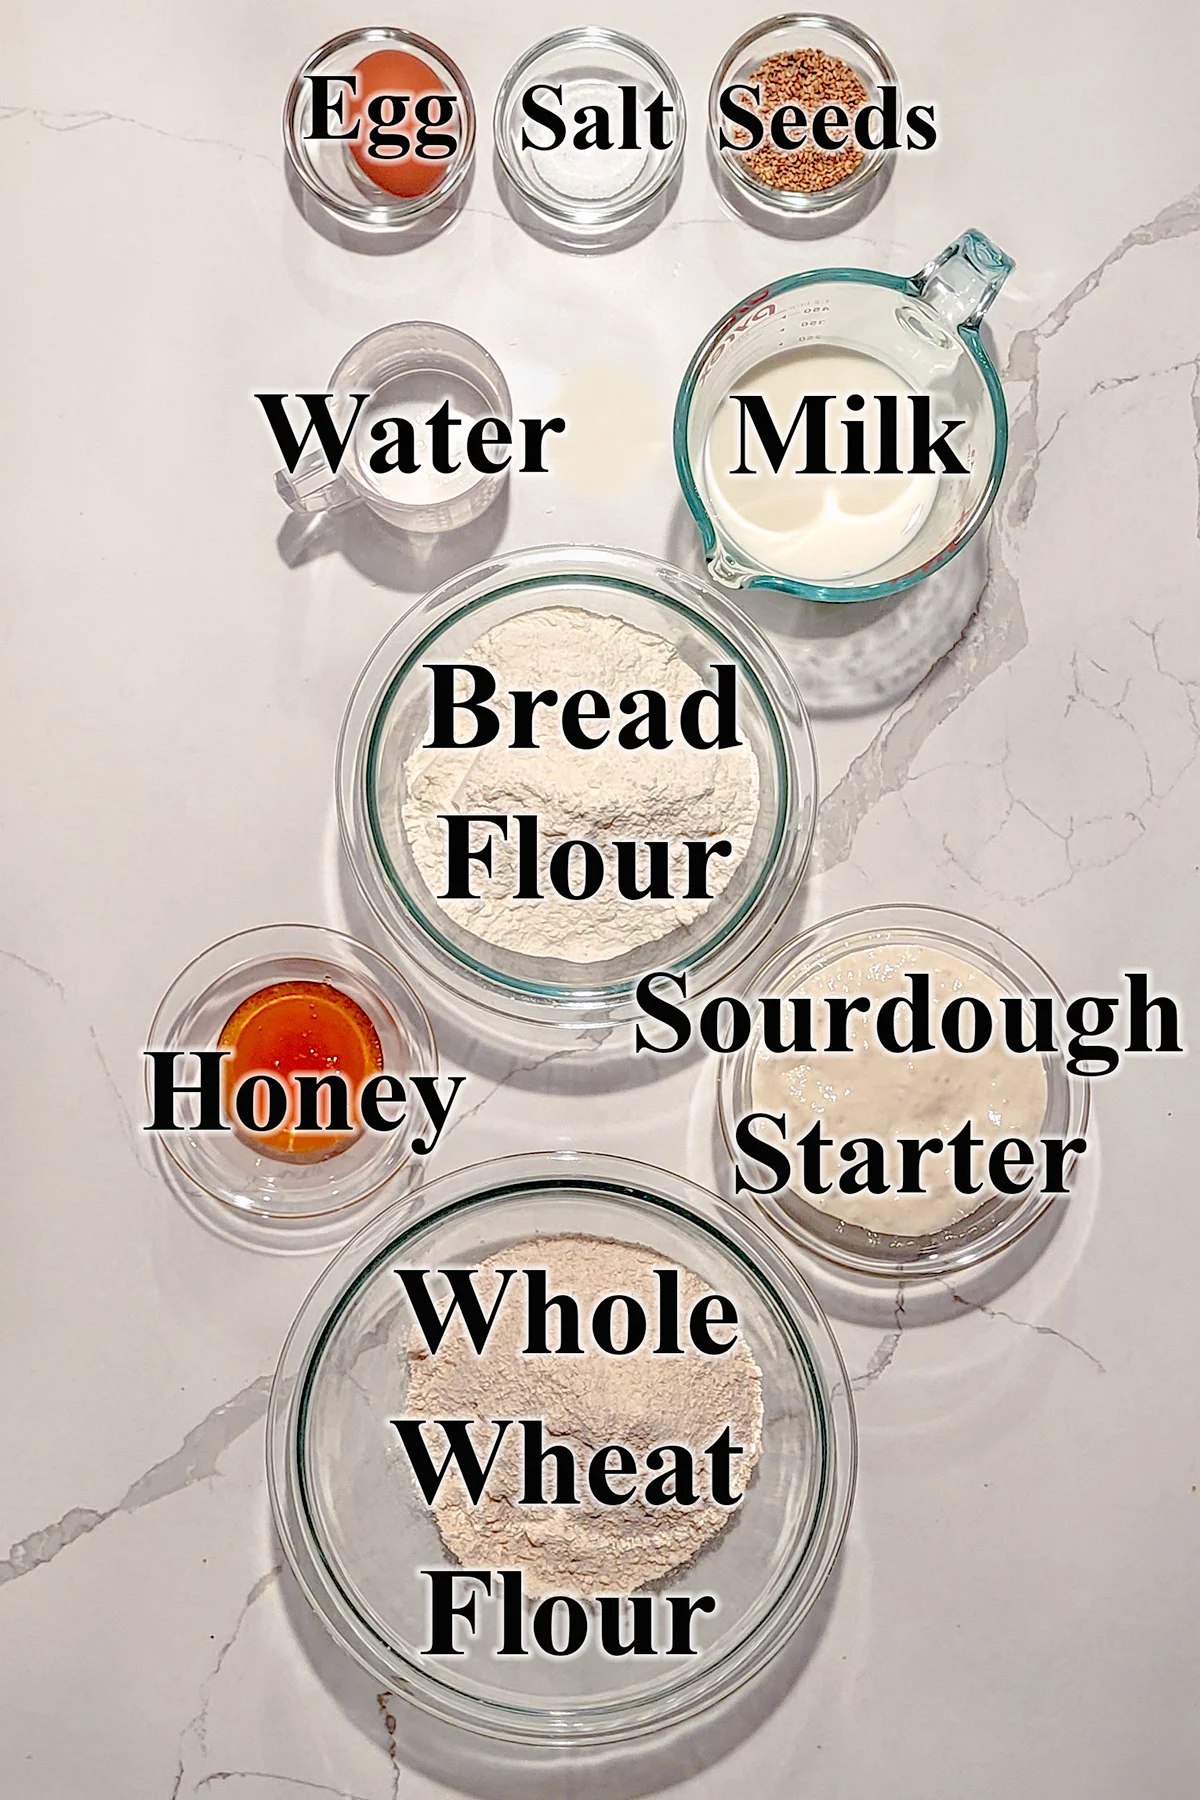
Ingredient Notes
- Sourdough Starter – This recipe was developed using 100% hydration starter. You will need to adjust the liquid or flour in the recipe if you’re starter isn’t at 100% hydration.
- Bread Flour has a high protein content. Higher protein means better gluten development.
- Whole Wheat Flour does not have quite as much of the gluten forming properties of bread flour. Using a combination of whole wheat and bread flour makes a loaf that has great whole grain flavor, yet rises tall in the oven. You can adjust the proportion of wheat vs. bread flour to make a loaf to your liking.
- Milk – Scalding denatures (breaks down) proteins in the milk which can interfere with gluten development.
- Honey – Adds wonderful flavor, enhances browning and makes the crumb soft and slightly sweet.
- Salt – For flavor.
- Sesame Seeds – For crunch and flavor on the crust.
How to make Whole Wheat Sourdough Sandwich Bread
See the recipe card for detailed measurements and instructions.
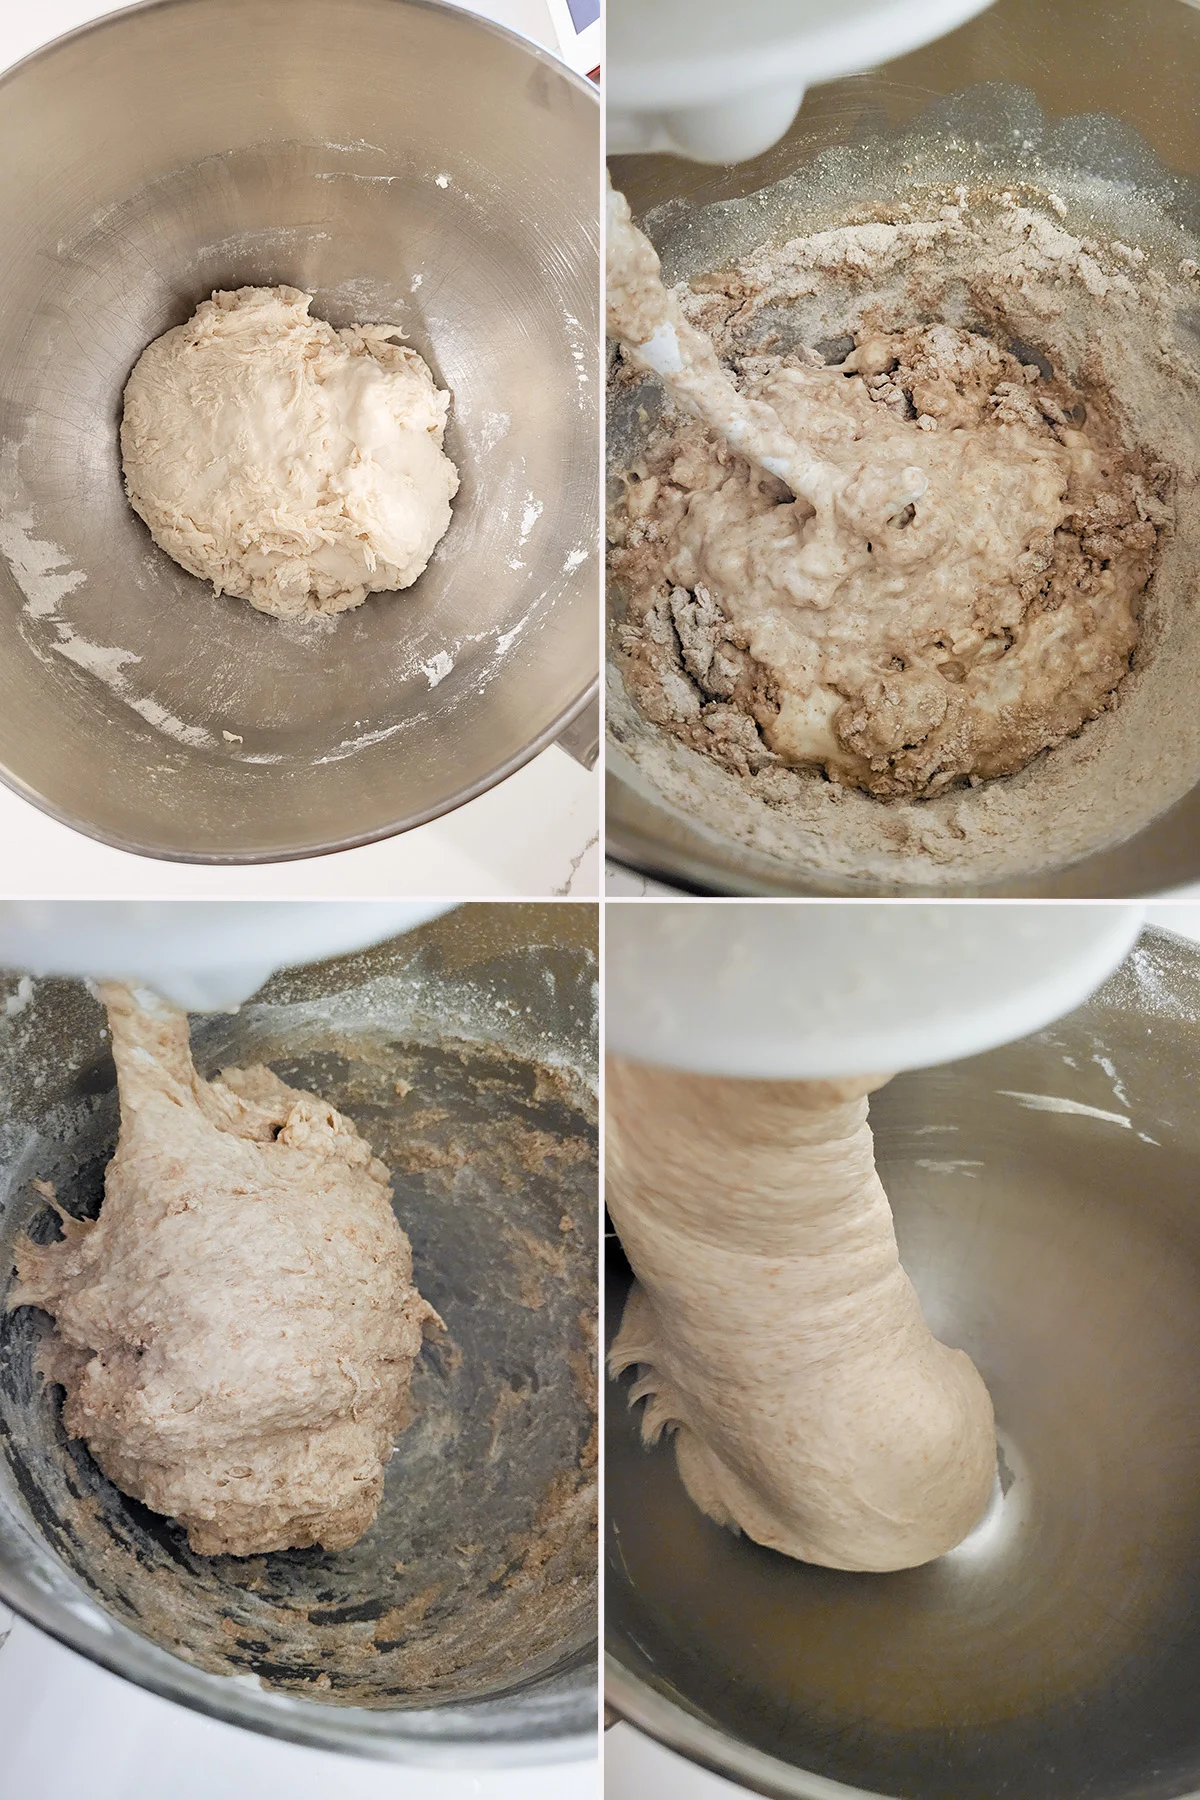
- Combine the starter, water and 1 cup of the bread flour to form a thick batter. Cover the bowl and set the mixture aside for 30-60 minutes.
- Add the rest of the ingredients.
- The dough will start out quite rough and sticky.
- Continue kneading until the dough begins to gather on the hook and pulls away from the sides of the bowl. Place the dough in an oiled bowl, turning once to coat the dough. Cover and set aside in a warm spot.
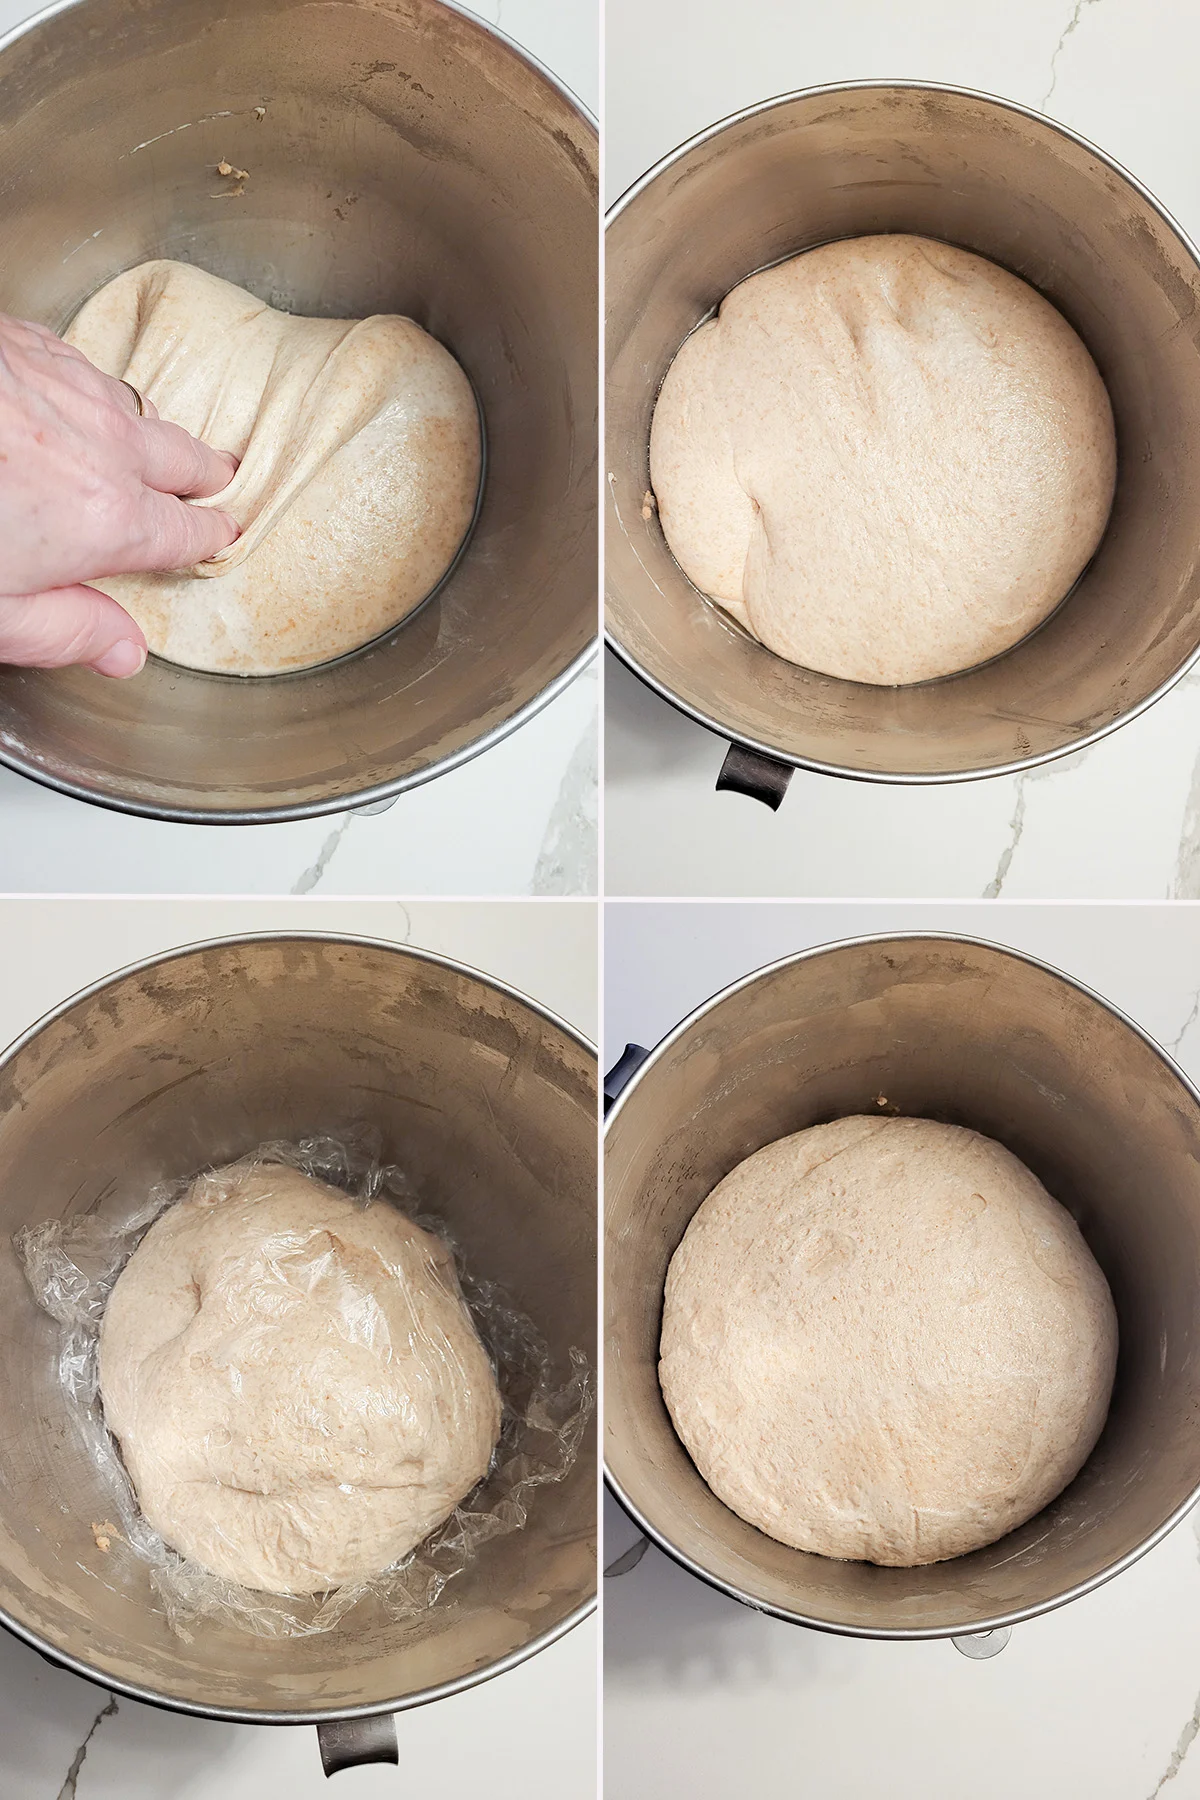
- After 30 minute, lift one side of the dough and fold it into the middle of the dough. Repeat with the other three sides of the dough then flip the dough over.
- Fold the dough every hour. After 3 hours the dough should be lively, elastic and airy.
- Cover the bowl tightly and refrigerate overnight. (If you prefer you can skip the refrigeration step and continue shaping the loaf right after the initial fermentation.)
- The next morning continue with shaping.
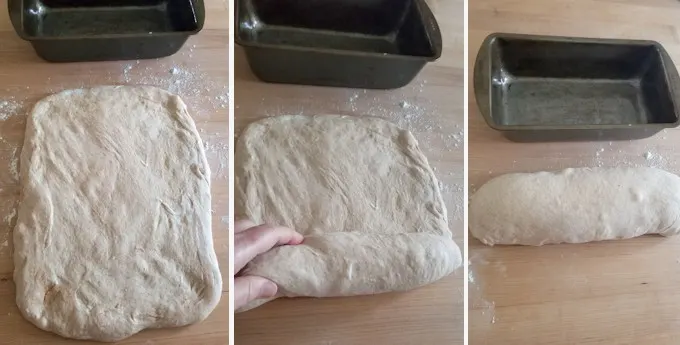
- Without kneading, use your hands to pat the dough into a rectangle.
- Roll the dough to a log.
- Set it into a lightly greased loaf pan
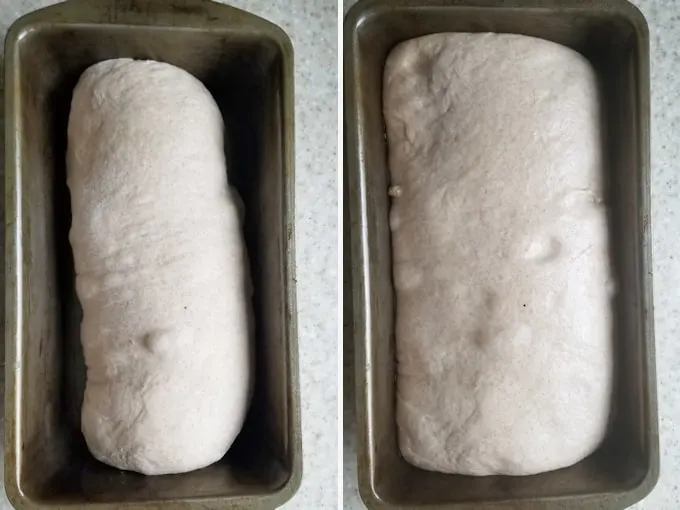
- Cover the pan and set it aside for 1 1/2 – 2 hours.
- The loaf will rise to fill up the loaf pan.
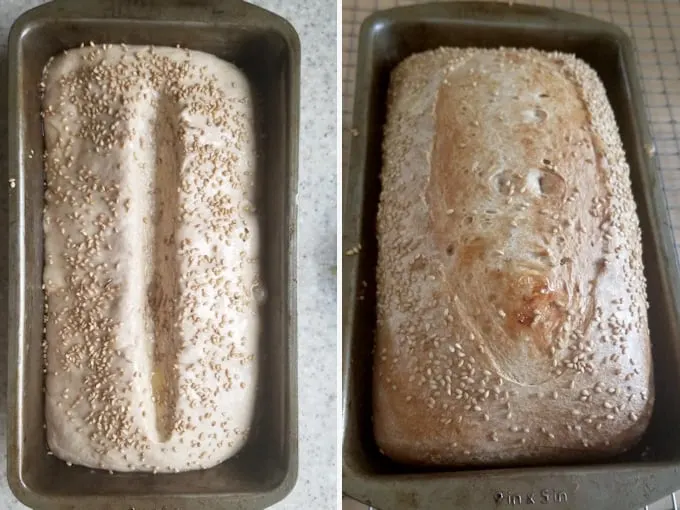
- Cut a slash down the center of the loaf. Brush with egg wash and sprinkle with sesame seeds (optional).
- Bake until the interior is 200F.
A timeline for making this recipe
- If your starter needs feeding, do that the night before or early in the morning of the day you want to make the dough.
- Mix the dough in the afternoon, allow it to ferment for 3-6 hours then refrigerate the dough before going to bed.
- Take the dough out of the refrigerator first thing in the morning, shape the loaf and set it into the pan.
- Leave the loaf to rise for 1 1/2- 2 hours, or as long as is needed to almost double in size.
- To make and bake the dough in the same day, feed your starter the evening before so it’s active by morning. Start the dough early in the morning and it should be ready to bake by late afternoon or early evening.
Storage
Sourdough Whole Wheat Bread stays fresh at room temperature for 2-3 days. The bread (sliced or whole) can be frozen for up to a month.
I know you hate to throw away that sourdough discard. Check out these recipes that use sourdough discard.
If you love this recipe as much as I do, I’d really appreciate a star rating and a quick comment. Ratings and comments help my recipes show in search results. Thanks!
Whole Wheat Sourdough Sandwich Bread
Ingredients
- 8 ounces active sourdough starter (1 cup (100% hydration))
- 4 ounces warm water (½ cup)
- 10 ounces bread flour (2 cups, see note)
- 8 ounces whole milk (1 cup)
- 1 ½ ounces honey (2 tablespoons)
- 1 ½ teaspoons table salt
- 7 ½ ounces whole wheat flour (1 ½ cups)
- 1 egg for egg wash
- Sesame seeds for garnish (optional)
Instructions
- In the bowl of a stand mixer or in a large mixing bowl, combine 8 ounces active sourdough starter, 4 ounces warm water and 1 cup (5 oz) of the bread flour to form a thick batter. Cover the bowl and allow the mixture to rise for 30-60 minutes. Warm 8 ounces whole milk until scalding hot then set it aside to cool until it is slightly warmer than body temperature.
- Add the scalded milk, 1 ½ ounces honey and 1 ½ teaspoons table salt to the sponge. Stir to combine. Add 7 ½ ounces whole wheat flourand stir until the batter looks like thick pancake batter. If using a stand mixer, switch to the dough hook.
- With the mixer running, slowly add the remaining bread flour. Continue mixing until the dough begins to gather on the hook and pulls away from the sides of the bowl. Knead for 5 minutes. If mixing by hand, add as much of the flour as you can in the bowl then finish kneading in the rest of the flour by hand.
- Dump the dough onto a lightly floured surface. The dough should be soft and slightly sticky. Knead to form a smooth ball. If the dough is very sticky sprinkle a little more flour as you knead. Place the dough in an oiled bowl, turning once to coat the dough. Cover and set aside in a warm spot.
- After 30 minutes uncover the bowl, lift one side of the dough and fold it into the middle of the dough. Repeat with the other three sides of the dough then flip the dough over. You're basically turning the dough inside-out to redistribute the yeast and strengthen the gluten. Cover the bowl and after 60 minutes repeat the procedure again.
- Cover the bowl and after 60 minutes fold the dough one more time. By now the dough should be lively, elastic and airy. If the dough is still sluggish give it another hour or two at room temperature. If you want to finish making the bread in the morning cover tightly and refrigerate overnight. The next morning continue with shaping. Otherwise continue shaping the loaf on the same day.
- Turn the dough out onto a floured surface. Without kneading out the air, gently push the dough to a 9"x 12” rectangle. Tightly roll the dough from top to bottom to form a log shape. As you roll pinch the ends of the dough to form a tight roll.
- Grease a 9"x 5" loaf pan with a very light film of vegetable oil or with baking spray. Set the dough into the pan and cover with oiled plastic wrap. Set in a warm place to rise until the dough almost doubles in size, about 1 ½ hours. It will take longer to rise if the dough is cold from a night in the refrigerator. In the meantime, preheat the oven to 350 °F.
- Use a sharp knife or razor to cut a 1/2" deep slash down the center of the loaf. Brush the dough with egg wash and sprinkle with seeds.
- Bake about 35-40 minutes until golden brown and and a toothpick inserted in the center comes out clean. The interior temp should be about 200 °F.
- Cool in the pan about 5 minutes before turning out onto a cooling rack. Cool to room temperature before slicing.
Would you like to save this recipe?
As an Amazon Associate and member of other affiliate programs, I earn from qualifying purchases.






The yeast version of this bread has been my go-to Pullman pan recipe for a couple of years now. I finally tried this version with my 50+ year old starter. Another winner. Thanks!
Some things I’ve learned:
If you add no more than 10% whole wheat, the rise, crumb and density will be the same. Adding a bit of fat (5-6 grams) to a bread recipe makes it softer.
Cold proofing makes the yeasts that cause rise to sleep, while the bacteria that adds depth of flavor, stays active. That’s why a cold proof of 8-16 hours after shaping creates very little rise but makes a loaf more flavorful. Take it out of the fridge, slash it deeply and at a 45-degree angle, throw it into a screaming hot 500°F oven and covered baking vessel, for 10 minutes then lower to 450°F for 30-35 minutes, and watch it pop after the yeasts awaken from their cold nap. No peeking. It will work.
For the oven:
On a colder day, take a few hours and, using a quality digital thermometer with a cabled or “leave in” probe centered on the center rack, verify the temperature of the oven for the commonly used baking temperatures: 350, 375, 400, 425, 450 and 500. Make a notation of the actual setting to obtain the proper temperatures. Most ovens can be off by as much as 50°F. Some newer models have a calibration adjustment.
When calibrating, I place a heavy piece or two of cast iron bakeware on the bottom-most rack space or directly on the heat shield to act as a thermal load in order to steady the temperature. It slows the calibration process but improves the accuracy. Heating elements cycle on and off. There’s a rapid heating followed by a gradual cooling; then it repeats. The thermal load significantly flattens that out.
Made this today replacing 1/2 cup whole wheat flour with wheat bran. Found out my oven temp is off, will have to increase temps at least 10 degrees in the future. Looks & smells great
Could I replace some of the wheat flour with wheat bran? How much would be good?
You could. Maybe start with 1/2 cup? You could also check out my recipe for Multigrain Bread.
@Eileen Gray,
Thanks, I’ll try 1/2 cup & let you know how it goes. I also saved your multigrain sourdough recipe
This is our go-to, everyday bread that I’ve been making for years. I’ve made it with entirely whole wheat flour which of course produces a heavier but still delicious loaf. I’ve used buttermilk instead of regular, just to use up the buttermilk, and the result was fantastic. There is no going back to store bought bread for us.
A wonderful bread; been making it for 2-3 years, and I can’t believe I didn’t give a shout out until now-so sorry! I double the recipe, and get 3 loaves; and sprinkle it with rolled oats instead of the sesame seeds.
If I have a starter and recipe/method that I like and use to make 100% whole wheat sourdough with water, will it work “the same” with milk instead of water? Would you expect the starter, mixing, proportions, proofing, timing would work or should I expect different results.
Thank You, RIchard
I would expect different results since milk adds fat, milk sugar and milk proteins in the dough.
Beginner here, both with sourdough and bread making, but Thank You for this lovely recipe, this turned out wonderful, best loaf of bread I have ever tasted and my husband agrees 100%. Will be making this again and again & here’s to hoping that my skills improve 🙂
Could I mix the dough ingredients in the evening and let it bulk ferment overnight on the counter, then shape, proof and bake next morning? Would any of the ingredients change? Also, does a higher amount of starter means a faster rise time?
Yes, I’ve actually done this by mistake when I forgot to put the bowl in the fridge before bed. As long as your kitchen is fairly cool it shouldn’t be a problem. I don’t find that the amount of starter makes the rise time faster. Of course all the timing is dependent on the activity of your individual starter as well as room temp, etc.
This has become my favorite recipe I make with sourdough starter. It comes out delicious every time–not finicky or tricky like artisan sourdough can be. My only alteration is to the baking time; I bake it 45-50 minutes for perfection. It is especially good toasted.
Thanks for answering my question! I did make this on Wednesday (did it all the same day. I definitely had lots of “give” in the dough. The only mistake I made was not making my roll tight enough so it wasn’t quite as “pretty” as it could have been.
Hubby is an absolute bread freak and it couldn’t care less that it had a wrinkle here and there. He loves the bread and is glad I found your recipe. We used some of it for sandwiches yesterday at lunch. Between the bread and my fresh, home grown tomatoes, that sandwich was hands down the best sandwich I’ve ever eaten. I’ll check out the rest of your recipes as I’m a sourdough junkie. I use my starter 2 or 3 times a week.
Thanks!
Nothing better than a home grown tomato sandwich.
Please explain what you mean by lively and airy. I think I understand but not sure. Thanks in advance.
I’m not sure I can think of a better descriptor. The dough when it’s first mixed will be heavy and dense. If you push on the dough it has very little give. After fermentation you should be able to feel the air in the dough. If you push against the dough it will have lots of give.
I’ve made this bread several times and it has become a favorite for our family. I follow the recipe exactly, and it is always delicious!
I’ve made this several times. I find the amount of flour spot on (though I always judge the dough kneading on the board and add flour as needed). I use goat milk (as that’s what’s in our fridge). I slice diagonal X’s instead of down the middle, as down the middle promotes shoulders over the edge of the pan. Considered higher bake temperature but I like the rise in the oven I get at 350° so I opt for more time instead – 50 minutes. Lovely stuff!
I made this recipe exactly as provided and it was perfect. It was a nice warm day so I didn’t have any issues with it rising. My whole family thought it was so delicious, even my daughter who is very picky about bread. I can’t wait to try some of your others!
I don’t usually comment on recipes, but holy kamole! I made this last night with sourdough discard so I cheated and added some yeast because I needed bread.
This was the absolute best homemade bread I have ever made! Thank you Eileen Gray! You are one fine cook. I recently found your website and you are my official’go to’ whenever I’m searching for a recipe. It wasn’t my prettiest loaf, but it sure has the flavor. I used coconut milk because that was all I had to work with. I will be making this often!!
Following the recipe exactly, I’ve found that the batter is way too loose to ever knead it! I’m going to have to add more flour, half a cup at a time, until it finally comes together. I don’t know how no one else is having this problem. I’ve been baking all kinds of bread for five decades so I’m not a beginner. It sounds good so I hope I can make it turn out okay.
Are you measuring by volume or by weight? If you’re measuring by volume I use the “dip and sweep” method for filling the measuring cups with flour. If you spoon the flour into the cup you could be getting less flour by weight.
@Marybeth, I have the same problem. I have made this recipe around 8 times and I always have to add at least 1 more cup of flour…measured by weight.
Made this load yesterday and it came out beautifully. Easy recipe to follow. I used kefir milk instead as I had a lot of it and added chia seeds to it. Even my fussy 11 year old son enjoyed 2 slices for breakfast this morning! Will be making this soon again.
I shape my loaf in a bread oblong basket then turn out onto a baking sheet line with parchment and cornmeal. I cover the loaf with an inverted loaf pan and bake in not preheated 360 F oven for 30 min. then remove the loaf pan and bake uncovered for 20 min. . I also place another loaf pan 1/2 full of water on bottom shelf of oven while baking. I think not preheating oven gives the bread a bit more rise time . Covering it while 1/2 way through uncovering gives a nice crust.
I proofed my starter overnight for a richer sour dough taste. ratio 100% hydration, 2 cups starter and 1 cup flour 1 cup warm 85 F water. I planed to make your recipe today. Think I was still 1/2 asleep and added the 1/2 c warm water and 1 cup flour to my proof instead of measuring out the 1 cup of proofed starter before adding it. Not sure how this will turn out, but need to move forward . P>S> I have made your recipe with success prior to this . Thanks.
Getting ok rise, super oven spring and love the flavour but not getting a very soft texture/crumb. It feels damp even though I cook to 200F and leave for hours or overnight before cutting. I’ve been doing the same day method where I feed starter before bed. Mix in the am, bulk ferment for 4 – 6 hours at 78, shape proof for 3-4 hours at RT.. Starter is a bit sluggish, but have started using my instant pot to proof. Any tips, would the overnight fridge step help.
The bread is meant to have a soft texture. It shouldn’t feel “damp” but will be quite tender and soft. The milk and honey are in the bread for that reason.
I used white whole wheat and reduced the amount of honey. Also started the oven at 500, then reduced to 375 when I put the bread in. It turned out great! Thank you for this recipe.
Hello, I am wondering whether I could add a mixture of seeds to this recipe. I love this recipe but would like to enhance it with some grains. Thanks!
Sure, I would fold in the seeds when you shape the loaf and you can put more on top.
I recommend a 375 oven temp vs 350 for the same time. I’ve made this bread a couple of times and have much better results at the higher temp. thanks for sharing it. Off for a sandwich!!!!
Glad you found the sweet spot for your oven. We always have to consider the idiosyncrasies of our own oven when setting the temperature. If you have hot spots or cool spots, etc. An oven thermometer is also essential for knowing if your oven’s thermostat is accurate. Also, for a bread baked in a pan you also have to consider the material and color of the pan. I have a light aluminum loaf pan and a darker, heavier pan. The loaf will bake much faster in the dark pan than the light color pan.
Why do you let the starter ,water and flour sit for 60 minutes ? You did not do that with your white sourdough bread. What does that do for the bread>
The rest gives the gluten time to develop and for the flour to absorb the water. I don’t do it with the White Sandwich bread because I don’t have any water in that dough, just milk.
I love the white sourdough bread but the whole wheat rose so beautiful it was almost twice the size of my white and the taste was wonderful. My husband was so impressed 🙂
Well, it’s hard to compare loaf to loaf. I make both these recipes all the time and sometimes I get a better rise than others. It’s usually either because of the activity of my starter or when I’m patient enough for the final rise before putting it into the oven. I just made the white loaf last week and I think it was triple it’s original volume by the time it came out of the oven. If you form the loaf with cold dough (as I do since I leave it in the fridge overnight) it needs time to come to temp all the way to the middle before you really get a full rise. Next time try giving the white bread more time to rise before putting it into the oven.
This turned out perfectly! I used buttermilk since I had some in the fridge that needed to be used and used all-purpose flour. My dough seemed pretty manageable before putting in the refrigerator so I went ahead and shaped it and put it in the loaf pan. The next morning, it was already doubled in size so I just went ahead and baked it straight from the fridge. I had to add about 10 more minutes to the bake time to get it to 200 degrees. It came out so pretty and perfect! That cooling time was excruciating before I could slice and taste it. Will definitely be making this again and again!
I have made this bread with buttermilk and really like the flavor.
This sounds delicious! We just found out my son is allergic to dairy and I’m still breastfeeding. Could I substitute almond or coconut milk? Really hoping the answer is yes so I can try it. Thank you so much!!
Yes, I’m sure either would work.
Another fantastic recipe, thank you so much!
This is my second time making this bread and I expect it will turn out perfect again. I noticed that the five minutes of kneading with the dough hook doesn’t appear here, as it does in most of your sourdough re pies. I just wondered if this is missing, or maybe it is because of the flour types used here?
Hi Jean, it was an omission. I think I did some editing of the recipe and probably missed it. I’ve included that step in the recipe. Although, even without the kneading this dough will develop nicely during the fermentation. So if you find the sticky dough hard to knead you can make it as a “no knead” dough.
I’ve been learning to bake bread since Quarantine 2020 and this was my first attempt at a whole wheat bread with my sourdough starter. Super easy recipe to follow, made exactly as directed and it turned out wonderfully! Would totally make again. Everyone in the family loved it, great for sandwiches. It’s nice and soft (so far, I baked it this morning and we just had lunch.) But I was able to cut slices to make perfect sandwich bread. I loved the effect the egg wash had – I’ve never done that before, but it made for a wonderful crust. Thank you!
So glad you’re enjoying your bread baking journey. Have fun.
Hi Eileen,
I’ve just realised that I’ve been leaving reviews rather than comments (5 stars to everything I’ve tried so far)!
I just want to say a big thank you for your sourdough recipes. They are easy to follow and your methods fit so easily, into the structure of my day.. Being able to see (and stop) the fermentation makes such a difference in warmer/changeable climates.
I live in France and my bread flour is more like your AP, so I have had to reduce my water/milk content accordingly. Now, having found the ‘sweet spot’, this is my basic bread recipe and I have begun to experiment.
Tonight, I’ve got a home-malted wheat dough mixture in the fridge – one 600g loaf and four rolls.
I only began to cultivate my starter at the beginning of the confinement and everything was a bit of a disappointment until I discovered this recipe…and your hamburger buns. They are ace!
Can I just suggest to those who (in Europe and perhaps other parts of the world) are finding your doughs to be too wet/liquid to work with – don’t keep adding flour! Next time, reduce the liquid. You can always add more. I, typically, reduce by 10-20%..
Biscuits tomorrow – but, never having ever eaten one, I have no idea how they are supposed to taste 😀
Thanks again and keep the recipes coming!.
Thanks for the feedback and tips, Karen. Biscuits are supposed to be soft, slightly sweet and rich. Not like a crusty bread. If you’ve ever had an English scone, it’s similar.
Delicious bread and prep worked for me pretty much as described. A suggestion: instead of measuring the water for the first step of mixing weigh it. I found much better results and a better balanced mix using 70g flour and 70 g water mixed with the starter to begin. The half cup of water made it too runny and I found I had to add flour in the later stages just to get the dough to firm up enough to fold.
Thanks for the tips and glad that worked for you. Although I will note that the 1/2 cup of water weighs 4 oz and step one instructs to add a cup of flour, which is 5 oz. So that ratio is actually slightly heavier in flour than equal 70g water and flour. But please do it however it works for you. I think recipes are meant to be adapted!
I tried this recipe. After adding all the ingredients the dough was almost soupy. I ended up adding almost 2 more cups of flour to get the dough manageable enough to knead. My recipe said 1 1/2 cups bread flour, and I see your current recipe calls for 2 cups.
I’m not a beginner; I’ve been making sourdough for 20 years. My starter is 100% hydration and I double-checked the measurements as I weigh everything instead of measuring.
I’m on my first 30 minute proof. We’ll see what happens.
I have no idea how anyone gets this recipe to work.
The recipe is meant to be baked in a loaf pan so a wetter dough can still hold it’s shape. I did revise the recipe to make the dough easier to handle. But even with the original amounts the recipe works. The original hydration percent would be 78%, which is quite wet. With the revision the current hydration percent is 69%, which is wet but certainly manageable. Do you weigh you ingredients or use cup measures? How someone fills the cup with flour can make a big difference in the weight of the flour. If you added 2 extra cups of bread flour, even with the original 1.5 cups to start, that would mean your dough had a total of 29 oz of flour. That would make the dough 52% hydration. That is quite a stiff dough. After the long fermentation, by the time it goes into the pan the texture should become more cohesive.
Hey! Love this recipe, but have a question about baking times.
I bake in glass pans, generally two loaves in the oven at once. Our loaves take anywhere from 50-70 minutes to get as browned as yours do with our oven set to 350 F. Any tips or insights on this? I plan to invest in an oven thermometer to check how accurate ours oven is. I’d like to stick with glass pans cause I have them but wouldn’t be opposed to investing in new ones if needed.
Sam
I bake my loaves in dark colored metal pans, so they will bake faster than in glass pans since glass is not a great heat conductor. Often I will take the loaf out of the pan once it is almost done and finish baking it right on the oven rack. Not only does this speed up the last few minutes of baking, it makes the crust nice and brown. An oven thermometer is always a good idea, but the baking time can vary because of the pan, the temp of the dough, etc. The baking times in a recipe are always just a guideline.
Is it possible to reduce or omit the honey without affecting the end result? Thanks.
Yes, You can either replace with sugar or just omit the honey. It’s there for flavor and moisture.
Hi Eileen,
I am making this now–fingers crossed! 🙂 I wanted to let you know that although you updated the measurement for the bread flour in the ingredient list (from 1.5 to 2 cups), that adjustment didn’t make it to the instructions. Right now, the instructions say that you add 1 cup of bread flour to the sponge, then only 1/2 cup to the dough mixture. In any event, I’m excited for these loaves–look like they’ll be great!
Thanks, I’ll update it.
HI Eileen,
I do not have whole what flour with me at the moment – If I substitute that with bread flour, do I have to make any adjustments to the rest of the recipe?
If you don’t have whole wheat flour I suggest you make the Sourdough Sandwich Bread. It’s the same type of bread made with white flour.
Hi Eileen, My family, friends, and I do love this whole wheat sourdough bread, and I have been making it for a couple of weeks. Just now reprinted this recipe, and noticed my new printout calls for 2 c/10 oz/280 g bread flour. My previous copy, from April, calls for 1.5 c/7.5 oz/210 g bread flour—did you change it? Even if so, I’ll continue with the 210 g weight— it works for me, and I now split that half bread and half AP and that works even better—for me. Finally, the whole wheat measures are the same, only the bread flour differs.
Wonderful website, just love it. I made your soft white sourdough sandwich bread for about a month before switching to whole wheat, to get the hang of sourdough. Your instructions are clear and thank you a million for including weights with your volume measures. I recommend your site to all my friends who bake. Thank you so much, Kim
Hi Kim, I did update the recipe. I added a smidge of bread flour to make the dough a little easier to handle, but not so much that it would make the loaf dense. I read all the (reasonable) comments and constantly remake my own recipes to try improve them. Please keep making it as you have been if you have no problem handling the dough.
How can 1 1/2 cups of flour weigh 210g? When I made this according to the weights in grams, it was a sticky mess and needed a lot more flour. When I weighed my flour according to the cups measurement, it was over 240g every time I checked. Please check your weight measurements!
1 1/2 cups of flour can weigh 210g because a cup of flour (as I measure it using the “dip & sweep” method) weighs 5 oz. So 1 1/2 cups weighs 7 1/2 oz. Using the conversion of 28g per ounce, 7.5oz x 28=210g. How you fill a measuring cup with flour will determine the exact weight you get each time. In fact, if you got 240g per 1 1/2 cup instead of 210g per 1 1/2 cup that’s only a difference of about 1 ounce of flour. Weight measures are always most accurate because volume measure will vary based on how the cup is filled.
Hi,
I just made this bread and its amazing. I was wondering if you have any suggestion for using 100% whole wheat flour instead of the 50/50. Thank you!
I think using all whole wheat flour would make the bread very dense. You’d have to try adding gradually more whole wheat flour until you get to a point where it compromises the structure of the bread.
I had the same issue as Tim, I followed the recipe exactly but had to add at least an extra cup of bread flour. I used both KA bread flour and whole wheat flour. I added ten minutes to the baking time, but the dough rose and baked beautifully. Is it my flour? Or maybe I should make my starter a little thicker? In any case, this is a great recipe. Thank you!
This is a wet dough. But make sure your starter is 100% hydration. If your starter is wetter you would need more flour.
Thank you for this recipe — I love the flavor and texture! I’ve made it three times now, and at the end of Step 4 it’s been sopping wet each time, like soup-consistency. I add between 1/2C and 1C flour to get it to come together and be kneadable, but then the rest of the steps go fine and the flavor is fabulous. Has anyone else encountered this?
I’m also curious about your thoughts of shaping after vs. before putting in the fridge overnight — I’ve been shaping it before and letting it rise in the morning and it works, I wonder if there’s a reason you recommend the other order?
Above all — thank you for this delicious recipe!
Hi Tim. Is your starter a 100% starter? If your starter is wetter you would need to adjust the flour or liquid accordingly. But this is quite a wet dough. I like to shape it in the morning because I find the cold dough easier to handle. But as you’ve obviously discovered, you can shape it the night before.
Hi Eileen,
I’ve been making this bread for quite some time now. It’s always a success for both spelt and wholemeal flour. I can no longer find any spelt or wholemeal in the supermarket. I would like to ask if I can use rye flour as substitute? Thanks.
Yes, you can use rye flour. Obviously the texture will be a bit different. But it will work. If you’re interested, I do have an Overnight Rye Bread recipe as well.
Hi Eileen,
I made this today and I must say that rye flour don’t work for this recipe. It end up really heavy and dense. I just wanted to use my starter atleast once a week by using rye as substitute. Anyway, I will definitely make this again using wholemeal or spelt flour which always end up a success! Thank you!
Then I would recommend the Overnight Rye Bread recipe.
Hi there Eileen. This recipe sounds great. I have some whole wheat bread flour on hand (which I’ve just used with great success in your sourdough bagel recipe by the way!), do you have any thoughts on using it in this recipe as well? I’ve tried subbing it for regular bread flour in other loaves that didn’t turn out so well so I wanted to ask. Thanks!!
Hi Elizabeth, to tell you the truth I’ve never worked with whole wheat bread flour. I would think it should be fine in this recipe. Do you know what the protein content is for that flour? I don’t see any reason it shouldn’t work here. Which type of recipes did it not work in?
Hi Eileen,
Thanks for the reply! It comes from a small local stone-mill I am lucky enough to live near. The protein content is 13%. The other loaf I tried it in was a quinoa and honey loaf, so the flop could have also been due to the type of quinoa I used and how I cooked it as well, but essentially it was very dense.
I think I’ll give your recipe a go this weekend!
if am wanting to mill my own grains what would be a good grain for the “bread flour” part of the recipe?
I would keep the “bread flour” part of the recipe and replace the whole wheat flour with your grain of choice. The bread flour is high protein and gives the dough most of it’s structure and strength. Whole grain does not contribute as well to gluten development. You could break out the 1 1/2 cups of whole wheat flour to include a total of 1 1/2 cups of 2 or three different grains for a “multi grain” bread. For example you could use 3/4 cup of whole wheat flour and 3/4 cup rye flour. If you want an extra hearty bread you could reduce the white bread flour to 1 cup and use up to 2 cups of the other grains. But the dough will probably be a bit more dense and might not rise quite as high.
Hi Eileen, thanks for this recipe! I made it for the first time today and it came out well. I’ve got a question about the steps in the instructions — it says to preheat the oven to 350 in the step that comes after step 7, which appears mislabeled as step 1. But after that, in step 3 it indicates to let the dough rise for 1 1/2 hours. Is this a mistake, or am I misunderstanding?
Thanks for the heads-up. It was a mistake copied over from another recipe. It’s been fixed.
Hi, I’m very new to baking…I followed the first step in the instructions and my batter did rise at all. My starter was very active when I used it….help.
How long has it been? Is the dough set in a warm or cool spot?
Hi Eileen,
I can’t access wholewheat flour at present – but do have spelt wholewheat in my pantry. Would I have to add any extra fluids if I use the spelt?
All good – I have made it and it didn’t need any adjustments
Have you made this with buttermilk before? I make a similar recipe using buttermilk. Just curious. Plus admittedly I LOVE baking with buttermilk.
As a matter of fact I have. I always have buttermilk in the house and will use it in place of whole milk sometimes. It is a little thicker than whole milk so you might have to adjust the amount of flour.
I have been making loaf bread for years but this was my first attempt with this recipe. I had a lot of starter to use and I typically prefer a 8”x4” loaf size so I doubled the recipe then divided it into thirds. It turned out fantastic! Eileen, thank you for your quick response to my questions!
Sure, happy to help.
Could this recipe be made with sugar (maybe maple syrup?) instead of honey? I have a baby who is starting solid foods and they can not eat honey before age 1. Thanks!
Yes, absolutely. Either will do.
I have a 9-month-old and made this recipe swapping honey for pure maple syrup with excellent results! I have also made similar doughs with molasses with equally great results. Or brown sugar with just a bit extra water to keep the hydration balanced.
Hi Eileen,
Just looking at your recipe, does 1 cup of sourdough starter weigh 140 g?
Thank you for including mls and grams, that really simplifies the recipe for me.
Sorry, I somehow forgot to add the weights for the starter. I use 8 oz of starter for all my recipes. 8 oz measures about a cup (depends how aerated it is). I use a 28g conversion for oz so 8oz x 28g = 224g. Thanks for picking that up. The recipe has been edited.
Could you use AP flour instead of bread flour for this recipe?
You could, the dough will be a little softer and wetter since bread flour will absorb more water than ap flour. You might just need to sprinkle in a little extra ap flour.
How do I double this recipe?
You can double the ingredients to make two loaves. Just makes sure if you’re using a mixer the mixer can handle that amount of dough. Otherwise, you should mix and knead by hand.
Hi Eileen
I made a huge success on making this bread! It was so lovely! Question, can I add seeds like, pumpkin, linseed, etc to the dough? Thank you!
Yes. I usually knead in seeds just before shaping the loaf. Also, don’t overdo the amount of seeds or the dough might be too heavy to rise well. You can also sprinkle some seeds on top for a crunchy crust.
I followed your instructions by putting the seeds before shaping and I also sprinkle on top. This is our weekly bread! Thank you! Question, can I use bigger loaf pan for this recipe? I have a spare 4-1/2″×10-1/2″ loaf pan. Thanks.
You can use a bigger pan. Obviously the loaf won’t be as high and it will probably bake faster since the dough will be spread out more in the pan.
How do you do this without deflating the dough?
I think I need a more specific question before I can answer. At what point did the dough deflate?
What temp do you bake?
350F.
wonderful crust, texture and taste. Thoroughly moreish!
Hi Eileen,
Would this work with wholemeal spelt flour instead of the whole wheat flour.
Thanks Carol.
Yes!
When do you add step #2?
Never mind I figured step #1 was the sponge
After allowing the sponge to rise for 30-60 minutes you continue with step 2.