Milk & Honey Whole Wheat Bread
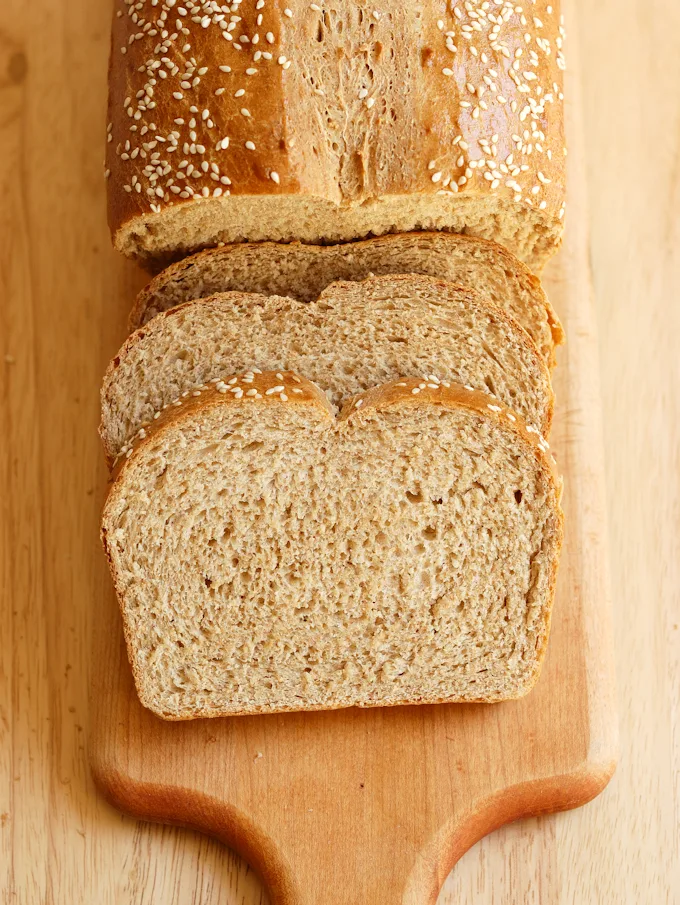
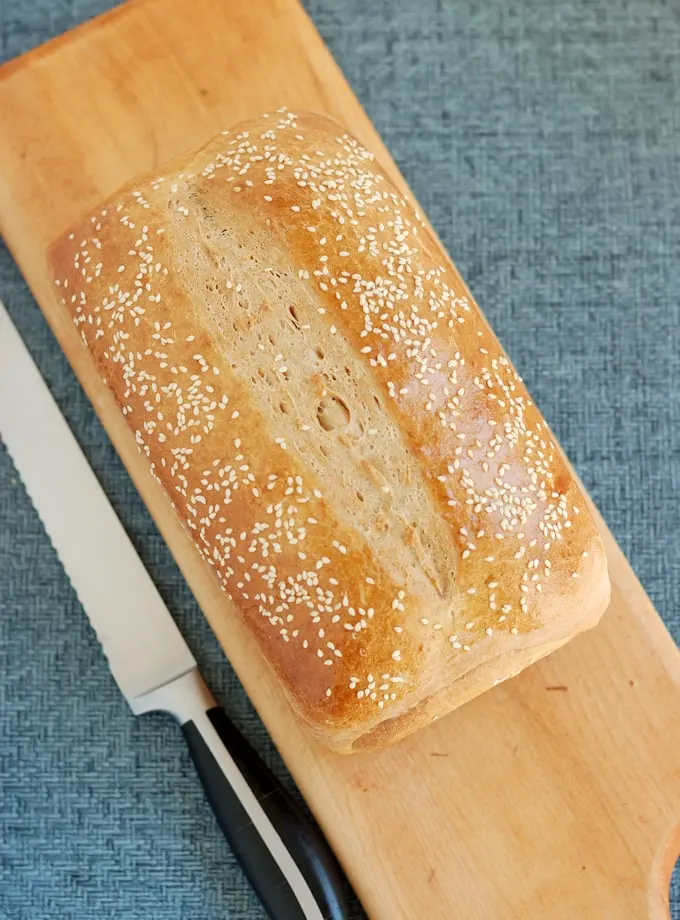
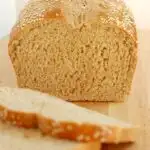
Milk & Honey Whole Wheat Bread is the perfect sandwich loaf. This easy whole wheat bread recipe makes a soft and slightly sweet bread that you’ll love.
Why you’ll love this recipe
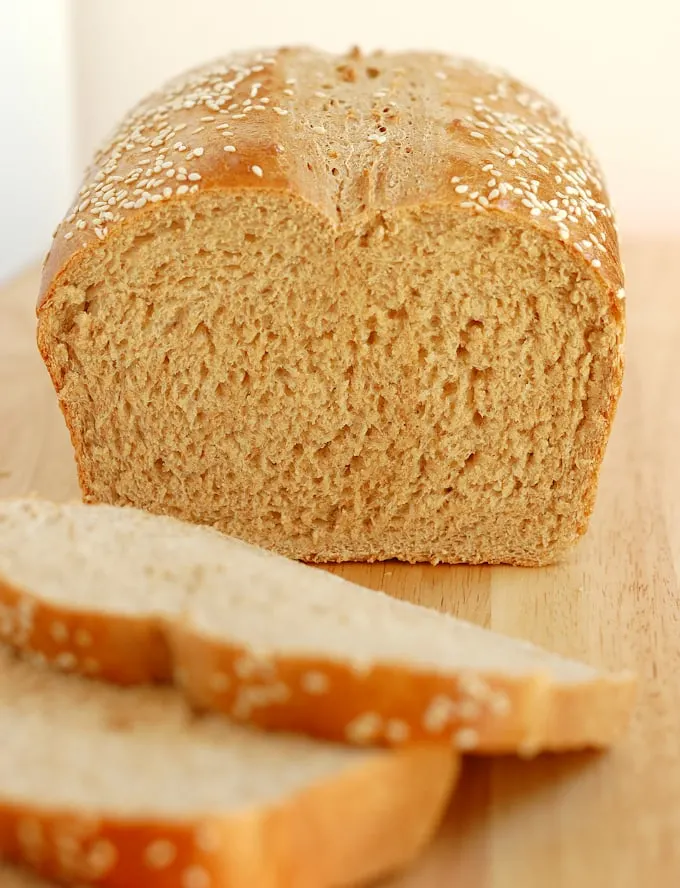
With it’s soft texture, hint of honey and hearty whole wheat flavor, Milk & Honey Whole Wheat Bread tastes fantastic and will keep fresh for several days.
You can start the dough the night before and finish the bread in the morning to have fresh bread for lunch.
If you’ve got a sourdough starter, you can make Whole Wheat Sourdough Sandwich Bread.
Ingredients
Ingredient Notes
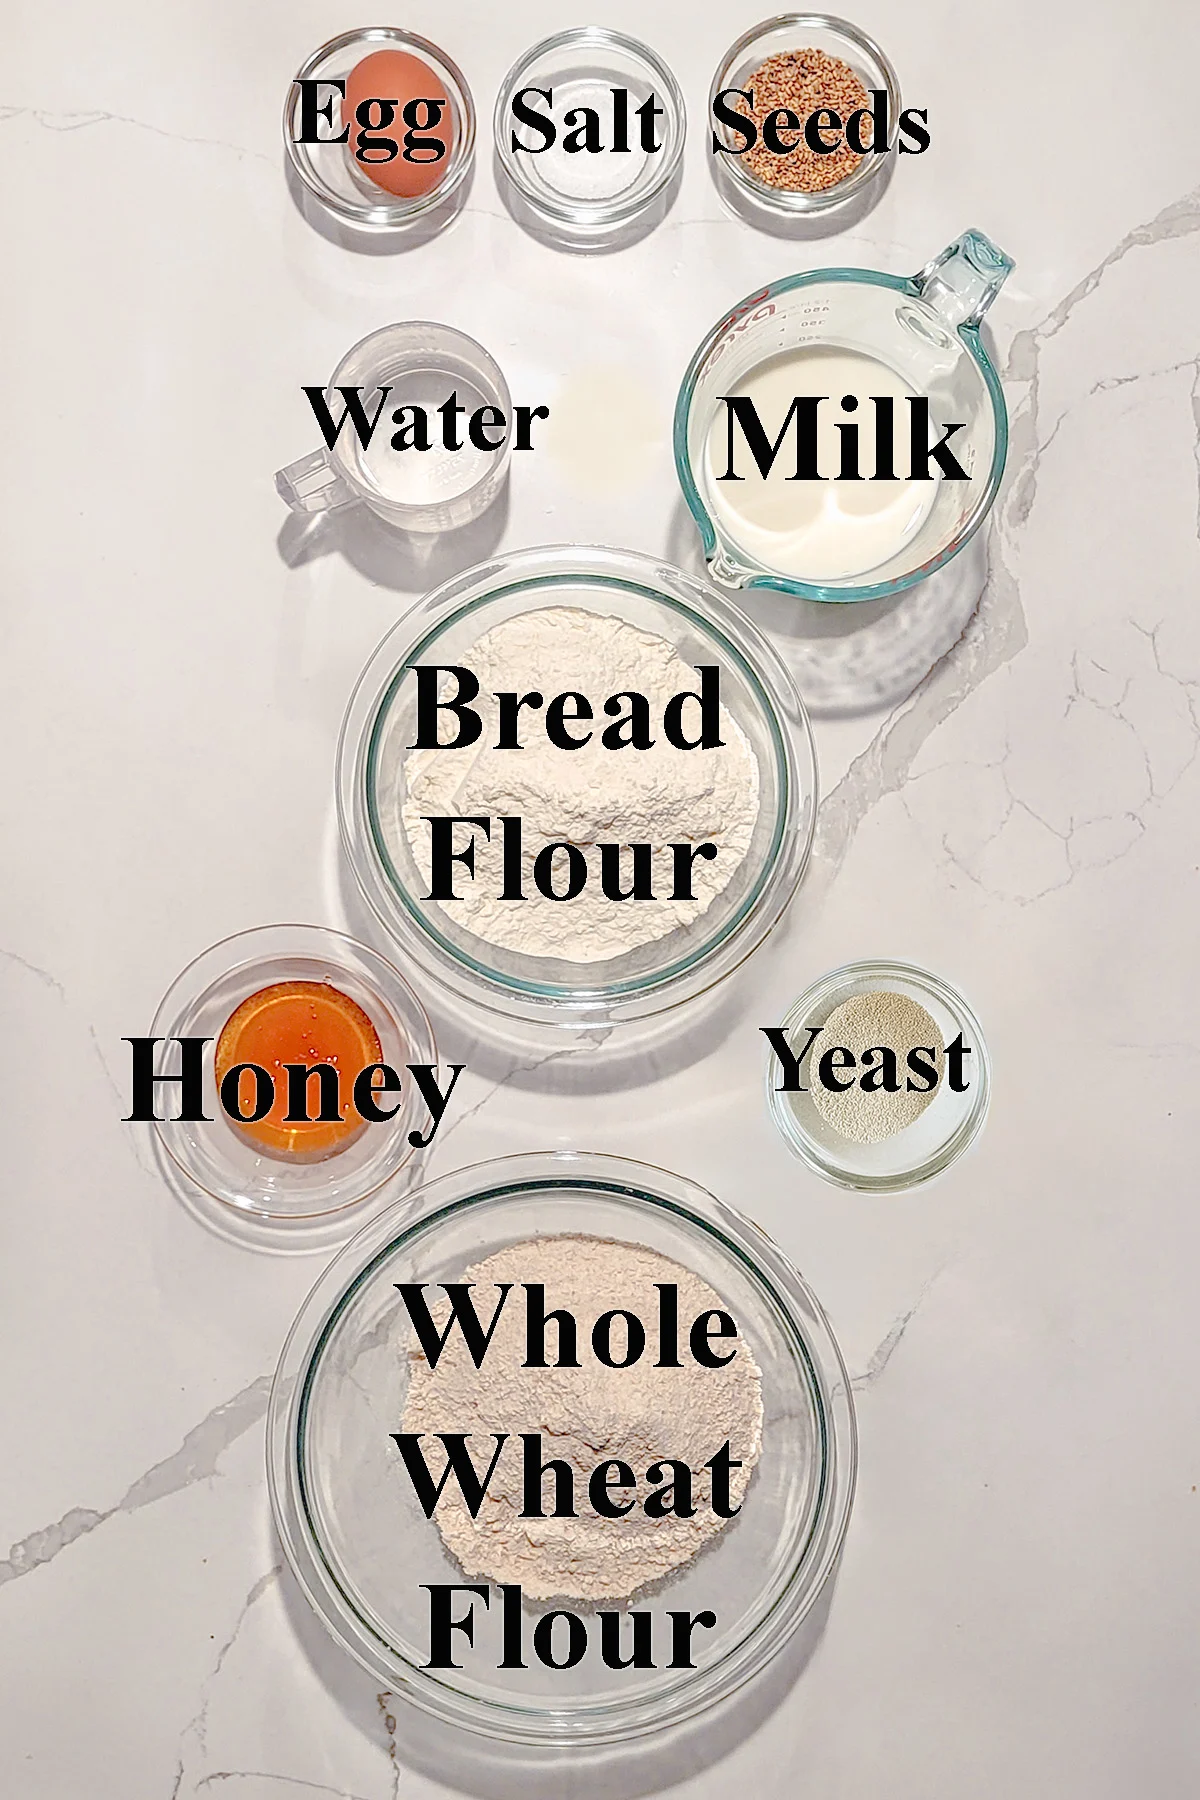
- Yeast – I prefer dry active yeast to rapid rise yeast for a slower rise time and better flavor.
- Bread Flour has a high protein content. Higher protein means better gluten development.
- Whole Wheat Flour does not have quite as much of the gluten forming properties of bread flour. Using a combination of whole wheat and bread flour makes a loaf that has great whole grain flavor, yet rises tall in the oven. You can adjust the proportion of wheat vs. bread flour to make a loaf to your liking.
- Milk – Scalding denatures (breaks down) proteins in the milk which can interfere with gluten development.
- Honey – Adds wonderful flavor, enhances browning and makes the crumb soft and slightly sweet.
- Salt – For flavor.
- Sesame Seeds – For crunch and flavor on the crust.
How to make Milk & Honey Whole Wheat Bread
See the recipe card for detailed measurements and instructions.
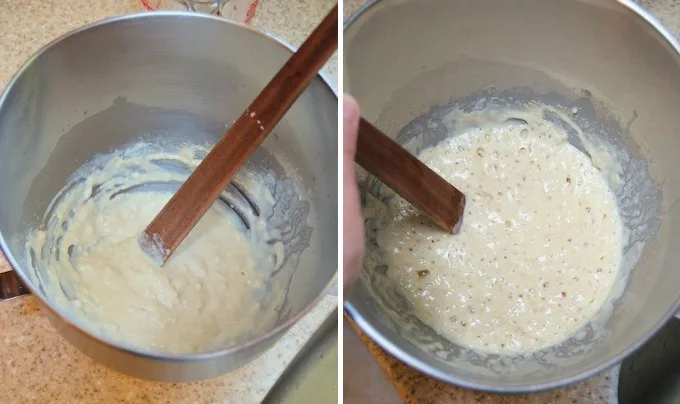
- Combine the water, yeast and some of the flour to form a “sponge”.
- Set it aside for 30-60 minutes.
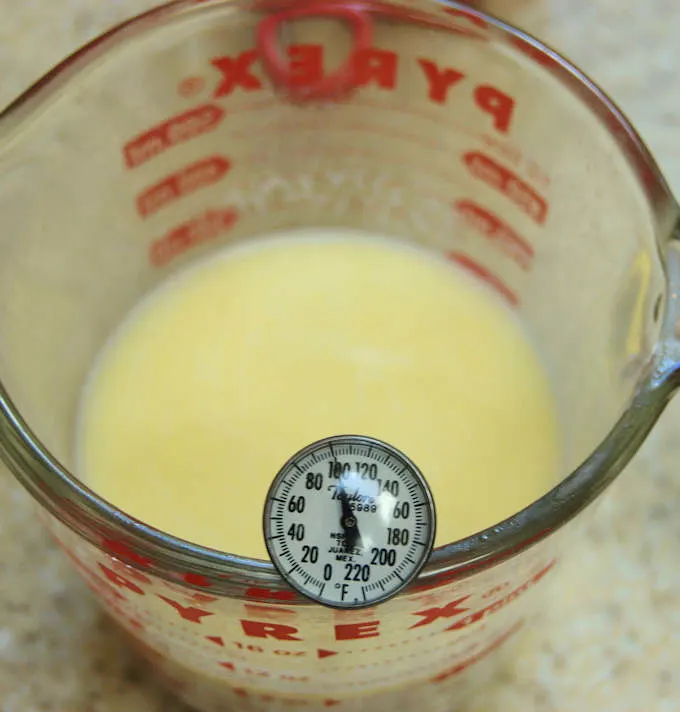
- While the sponge is rising, scald the milk.
- Set the milk aside to cool to 100F.
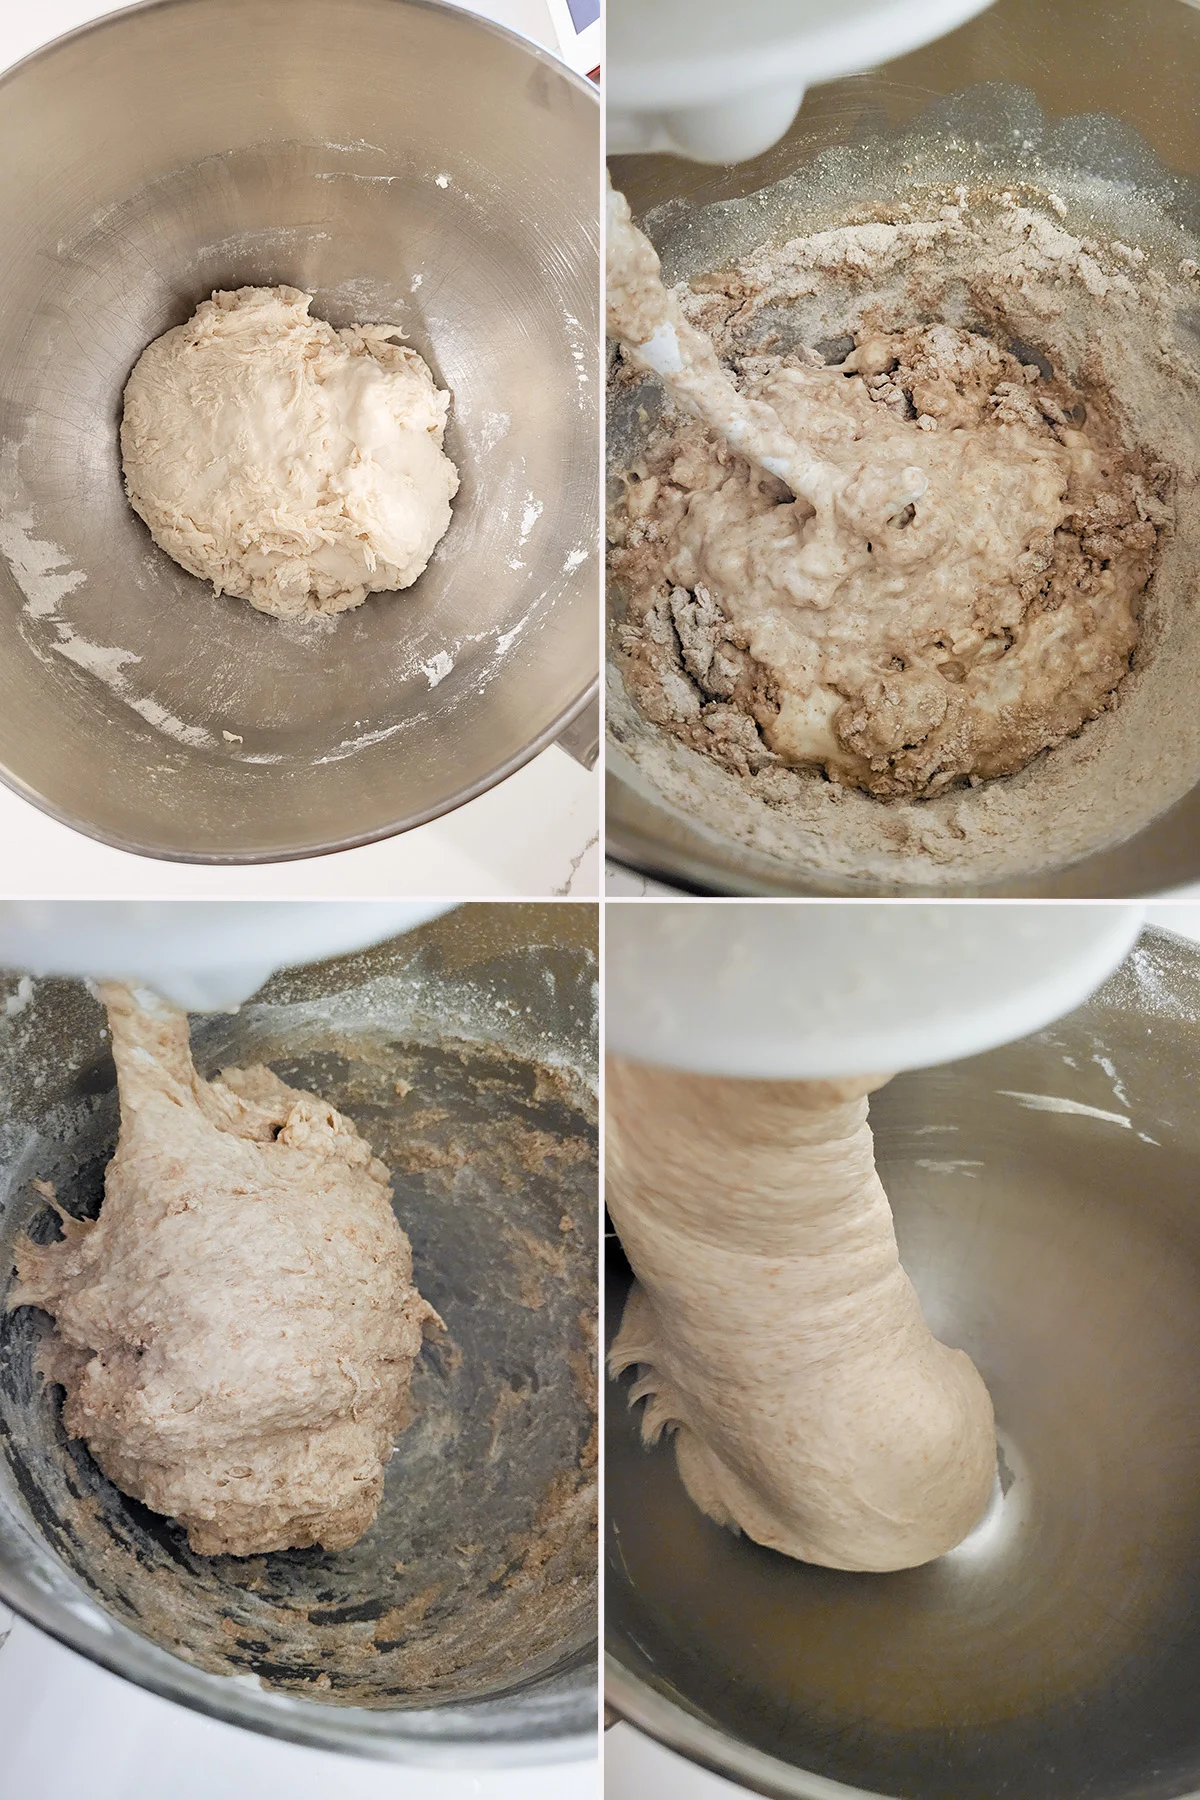
- Add the rest of the ingredients to the sponge.
- The dough will start out quite rough and sticky.
- Continue kneading until the dough begins to gather on the hook and pulls away from the sides of the bowl.
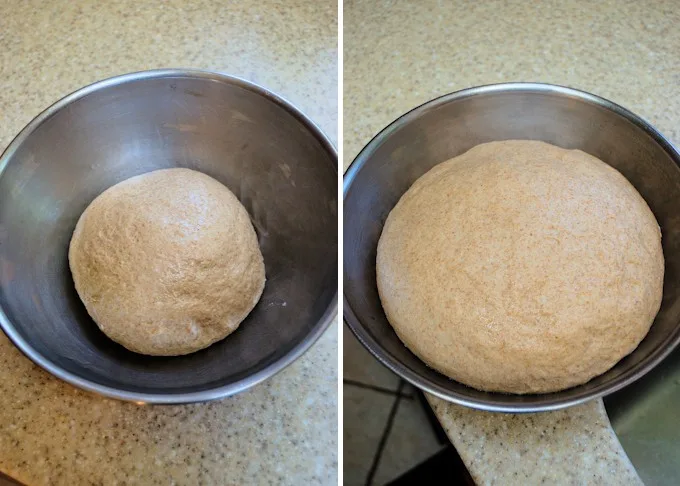
- Place the dough in an oiled bowl, turning once to coat the dough. Cover and set aside in a warm spot.
- Allow the dough to double in volume before shaping.
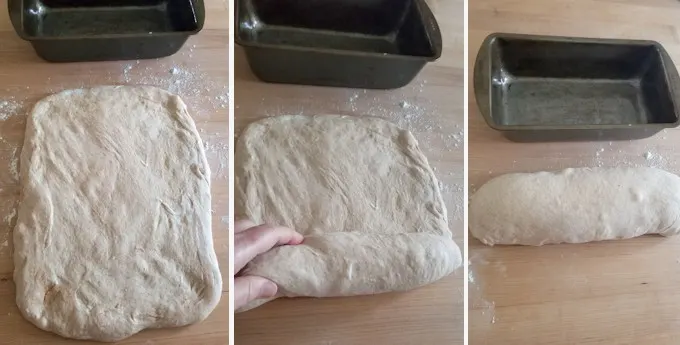
- Pat the dough into a rectangle.
- Roll the dough to a log.
- Set it into a lightly greased loaf pan
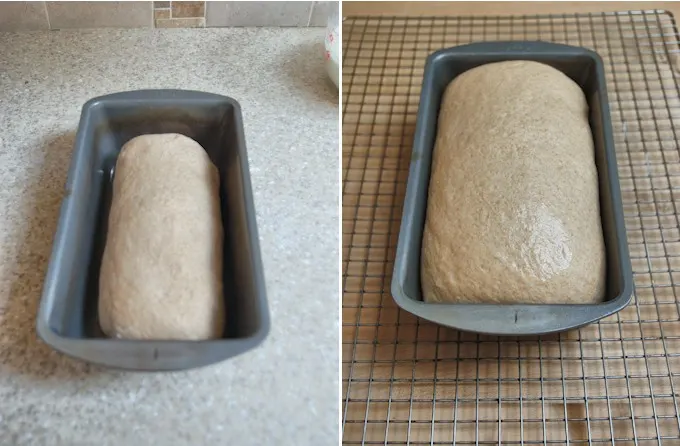
- Cover the pan and set aside in a warm spot.
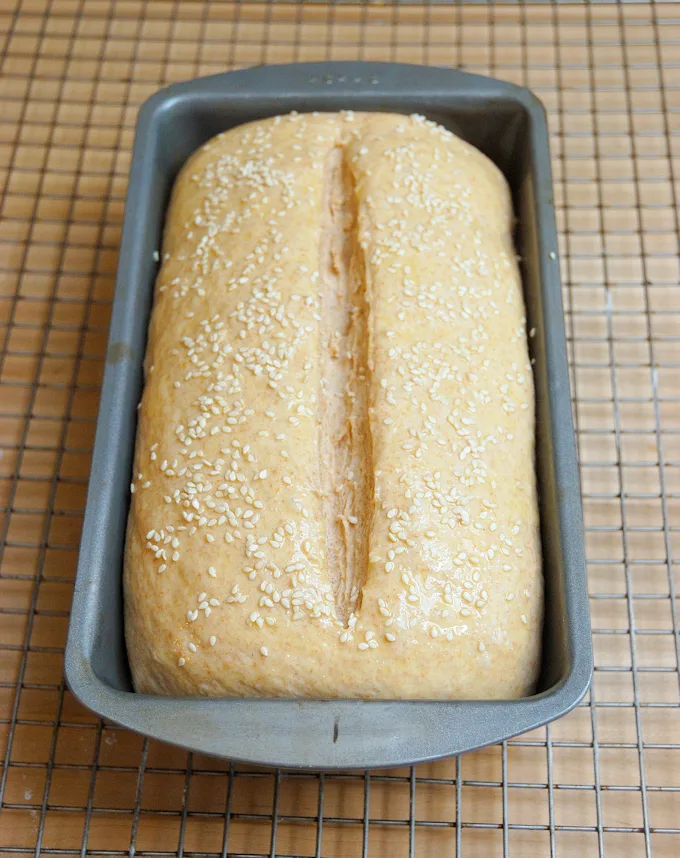
- The bread is ready to bake when it’s about doubled in volume and fills up the pan. If you poke the dough the dent should slowly fill-in. If the dough springs right back it’s not quite ready.
How to work ahead
- You can start your bread a day ahead. Start mixing the dough late in the afternoon or early evening.
- Make the dough up until the point that it goes into the pan.
- Cover the pan with plastic wrap and allow it to rise slowly in the refrigerator overnight.
- The next morning, take the loaf out of the refrigerator. It should have risen to fill the pan over night.
- Leave the loaf at room temperature while the oven preheats. If it hasn’t risen enough, give it a little extra time at room temperature to finish rising.
Storage
Whole Wheat Sandwich Bread stays fresh at room temperature for 2-3 days. The bread (sliced or whole) can be frozen for up to a month.
More great sandwich breads
If you love this recipe as much as I do, I’d really appreciate a 5-star review.
Milk & Honey Whole Wheat Bread
Ingredients
- 6 ounces warm water (¾ cup)
- 2 ¼ teaspoons dry yeast (1 packet)
- 10 ounces bread flour (2 cups, see note)
- 8 ounces whole milk (1 cup)
- 1 ½ ounces honey (2 tablespoons)
- 1 ½ teaspoons table salt
- 7 ½ ounces whole wheat flour (1 ½ cups)
- 1 egg for egg wash
- Sesame seeds for garnish (optional)
Instructions
- In the bowl of a stand mixer or in a large mixing bowl, combine 6 ounces warm water, 2 ¼ teaspoons dry yeast and ½ cup (2 ½ oz) of the bread flour to form a smooth batter. Cover the bowl and allow the mixture to rise for ½ hour. Warm 8 ounces whole milk until scalding hot then set it aside to cool until it is slightly warmer than body temperature.
- Add the scalded milk, 1 ½ ounces honey and 1 ½ teaspoons table salt to the sponge. Stir to combine.
- Add 7 ½ ounces whole wheat flour and another ½ cup of the bread flour. Stir until the batter looks like thick pancake batter. If using a stand mixer, switch to the dough hook.
- With the mixer running, add the rest of the bread flour, Knead until the dough gathers on the hook and clears the sides of the bowl, 4-5 minutes. If mixing by hand, add as much of the flour as you can in the bowl then finish kneading in the rest of the flour by hand.
- Dump the dough onto a lightly floured surface. Knead to form a smooth ball. If the dough is very sticky sprinkle a little more flour as you knead.
- Place the dough in an oiled bowl, turning once to coat the dough. Cover and set aside in a warm spot to rise for about 1-1 ½ hours until doubled in size.
- Preheat the oven to 350 °F. Grease a 9"x5" loaf pan with a very light film of vegetable oil or with baking spray.
- Turn the dough out onto a floured surface. Without kneading out the air, gently push the dough to a 9"x12" rectangle. Tightly roll the dough from top to bottom to form a log shape. As you roll pinch the ends of the dough to form a tight roll.
- Set the dough into the pan and cover with oiled plastic wrap. Set in a warm place and rise until the dough almost doubles in size, about 1 hour.
- Use a sharp knife or razor to cut a ½" deep slash down the center of the loaf. Brush the dough with egg wash and sprinkle with seeds.
- Bake about 30-35 minutes until golden brown and the interior temp is about 200 °F.
- Cool in the pan about 5 minutes before turning out onto a cooling rack. Cool to room temperature before slicing.
Would you like to save this recipe?
As an Amazon Associate and member of other affiliate programs, I earn from qualifying purchases.




Love this recipe in my 9″ Pullman pan. I use just 1/2 cup of water for the sponge and then only about 1 1/2 cups bread flour total. This makes the amount of dough just right for the pan and slightly ups the whole wheat content. The bread is always delicious with a wonderful texture and is perfectly square if I let it raise almost to the top before putting it in the oven: 30 minutes covered, 5 uncovered. Thank you!
Hello Mrs. Eileen,
You mention adding the butter to the scalded milk in the photo directions, but I don’t see butter as an ingredient in the recipe. Perhaps I’ve missed it. How much butter would be needed?
Our family loves your recipes! We made the bagels today. They were delicious. Thank you for what you do!
Oops, that was a typo. There is no butter in the recipe. Thanks for pointing out the mistake. Glad you enjoy the bagels!
Is the weight of 2 cups of flour 10 ounces?
Yes.
I’ve just baked this bread a second time. The first time was a little chaotic – the kneading, baking time, etc all had to be adjusted as I had never baked whole wheat bread before but it came pretty decent.
This time around, everything went well – I overnight proved it and I just took it out of the oven. Waiting for it to cool down so I can have a slice (or two) for breakfast. Thanks for the recipe – it’s a keeper!
Wow! I have been making artisan sourdough for years and my family just wanted some sandwich bread. This turned out perfect! This is now my go to recipe. Excellent instructions and so tasty. Thank you!
Thanks! There’s also a Sourdough version of this bread. You might also like the Sourdough White Sandwich Bread too.
Love this bread! I just finished baking 2 loaves because making just one keeps me in the kitchen when I need to get out to the garden. How do I start it the night before to finish it before lunch? Thank you!
I would make the dough in the evening and let it go through the first rise. Shape the bread and put it into the pan. Cover the pan and refrigerate overnight. Remove from the fridge in the morning. It may already be risen by then and you can go ahead and bake. If it’s doesn’t rise enough in the fridge overnight leave it at room temp to finish rising and then bake. It should be done by lunch.
@Eileen Gray,
Thank you so much!
I make at least 3 loaves this bread every week. My family loves it❣️
Mine too!
Love this bread! I always make the sponge with everything except the bread flour and add it after the sponge has risen. Have not needed the full 2 cups of bread flour yet. Always comes out beautifully and tastes amazing!
I just made a loaf of this the other day and it was gone in no time.
Like many others, I had to add A LOT of extra bread flour and ultimately I gave up on the dough because I thought that I must have done something wrong despite being very careful about weighing the flour and following directions precisely. I wish I would have read these comments before tossing out the dough. 🙁
I gave this a second try with some modifications. Since my first dough was very wet and sticky even with the addition of extra flour, I started off the second batch with 1/2 C water rather than 3/4. I also used whole wheat flour for the sponge. I ended up with a great loaf!
It looks delicious. I can imagine the smell of it, thank u for sharing such a recipe, can I add grains like rolled oats, flax seed and Shea seeds to it?
You could fold in some seeds. If you add oats you’ll have to compensate by reducing the flour since oat absorb lots of moisture.
Hi:
Your bread looks delicious and I’m saving it to my board so that I can make it ASAP lol. My question is, I have SAF instant yeast – would I use the same amount as with regular yeast?
Desiree
Instant yeast will work fine in this recipe. Yes, use the same amount.
Would it be possible to use sour milk in this recipe? Probably need baking soda also, I should think.
Thanks
Do you mean regular milk that has gone sour or something like buttermilk. I have made this recipe with buttermilk with great results. No need for the baking soda unless you want to neutralize the sour flavor.
My bread more than doubled after an hour, and when in the loaf pan it was almost to the top already. After proofing 45 mins in the pan it was over the top….. I purchased some really good yeast so maybe I should use less next time? Lol
Hi!!! I’m going to make this recipe today, The thing is… I don’t know the difference between bread flour and whole wheat flour, I made my own whole wheat flour, but I didn’t find “bread flour”, I’m going to replace that one with whole wheat… I’ll tell you what happens.
Thanks so much for the recipe, I can already taste it!!!!!!
Bread flour is a high protein white flour. Whole wheat flour doesn’t have as much protein and the whole grain will interfere with gluten development. You might find that your bread had trouble rising if the gluten is weak. Did you make your own whole wheat flour by grinding wheat berries? Are you based in the US?
I also had to add an additional one half cup of bread flour and still had a pretty sticky dough. After the first proof if was very loose for bread dough. I really couldn’t roll it into a log, so I basically plopped it into the bread pan. It fell over the sides a little during baking but I have to say the bread was delicious! I will definitely make it again and see if I get the same result.
Did you weigh your ingredients or use cup measures? If you use cup measures make sure to use the “dip and sweep” method. That is, you dip the cup into the bin and then sweep away the excess. If you fill the cup by the spoonful the flour will likely weigh less than my recipe specifies.
Hi Eileen
What happens if I use 1% or 2% milk instead of whole milk?
Joanne
No problem. Low fat milk would work just fine.
Like one of the other comments above, I too had to add a lot more of the bread flour than was called for in the recipe. Probably double before the dough started pulling away from the sides of the bowl. I triple checked all of my other ingredients so don’t know what happened. Hope it turns out! Looks yummy!
Just wondering if anyone ever made this in a bread machine?? I’d love to know the results!
Hi Donna! Sorry, I’ve never used a bread machine so I’m not sure if the recipe would have to be adapted for the machine.
I have made your bread every week for the last three weeks. Now it is the only bread my husband wants. Forget the bread in the grocery store!!! I just made another loaf today. It is rising as I write this! Thank you for the recipe. It is delicious!!
Hi Elyse…you just made my day! Thanks so much and I’m so glad you like the recipe. I like it too.
I accidentally forgot to warm my milk first, is my bread doomed? By the way, the first loaf I made ( I’m on my second) turned out beautifully and I followed the recipe right. So thanks for the amazing bread recipe, I’ll never use another!
Hi Sarah. Thanks so much for trying the recipe. I’m glad you liked it. The milk is warmed to activate the yeast. Yeast is active at temps between about 40″F-140″F. So using cool or cold milk will just slow down the rising process, but it will still work. Sometimes if my dough is very cold I’ll put the bowl with the dough over a bowl of warm water to help warm up the dough a little.
Oh thanks for the tip! It is taking a long time to rise, but I’m glad it’ll be ok! I just started making my own bread so I’m brand new to this.
Great!
What a gorgeous crumb you got on this!
Thanks, Kylee.
Hi, want to try this bread, but what do you mean by stones, and do you really have to use them? Thanks Ruth
Hi Ruth, I pre-heat stones in a pan on the floor of the oven. When I put the bread in the oven I pour water over the stones to create steam. The steam keeps the surface of the bread moist while it bakes and that creates a nice crust on the bread. I use “whiskey rocks” but any type of rocks will work. But you don’t need to use the rocks. You can skip them all-together and the bread will still be good. You can see a photo of how I use the rocks in this post.
Everything went well until I slashed the top… It deflated…
It’s in the oven now and it looks kinda sad. I’ll let you know about the texture and taste!
Hi Renee, If the bread over-rises it will deflate when you slash the bread.
Hi Eileen,
Thanks for the recipe! I am not sure what I did wrong, but I had to add well over 2 cups of all purpose flour to the mixture, before getting dough that held together enough to consider kneeding. It was still quite sticky once I turned it out of the bowl. Any ideas? Now it is rising on my windowsill. I look forward to tasting this bread…..love the method and that I can do it in my mixer, which I am still learning to use 🙂
Hi Ashley, Hmm, I’m not sure why you had to add so much more flour. Did you follow all the other ingredients? Did you use bread flour in addition to the whole wheat flour or all purpose flour? Using all purpose instead of bread flour could make a big difference. You might also find that the dough is less sticky after rising once.
Hi Eileen,
Just to clarify, your instructions say to put yeast in the sponge and then again once you add the warm milk, honey and salt into the sponge. It doesn’t say which amounts of yeast to put in the sponge and which amount to hold back, if any at all. Could you clarify this for me please? Thanks
Hi Keith. Sorry, that was a typo. The yeast goes in the sponge, not with with milk. I’ve changed the recipe to correct the error. Thanks so much for pointing it out to me. Eileen
So the whiskey stones can be hot or cold? Just looking on them at Amazon and I only see they are to be cold. Just want to clarify. Is there a specific brand you are fond of?
Hi Janet. The whiskey stones are meant to be chilled and used in a glass of whiskey. I stole my husband’s whiskey stones to use for baking bread. You can use any stones you’d like. Even something you find in the garden. It’s just to help create steam in the oven.
Question:
Can the bread be made in a bread machine?
Hi Carol. I’ve never used a bread machine, but I would guess you could make it that way. If you try it let me know how it works. Eileen
Wow – what a great tasting and great looking loaf! Have pinned to my Must Make board 🙂 Eb x
This bread. Seriously…YUM! Your photos sold it 🙂 Gorgeous! Plus, the recipe seems simple enough for those of us, ahem, that aren’t skilled in bread making 😉
Thanks, Sammi. It is quite easy and tasty.